

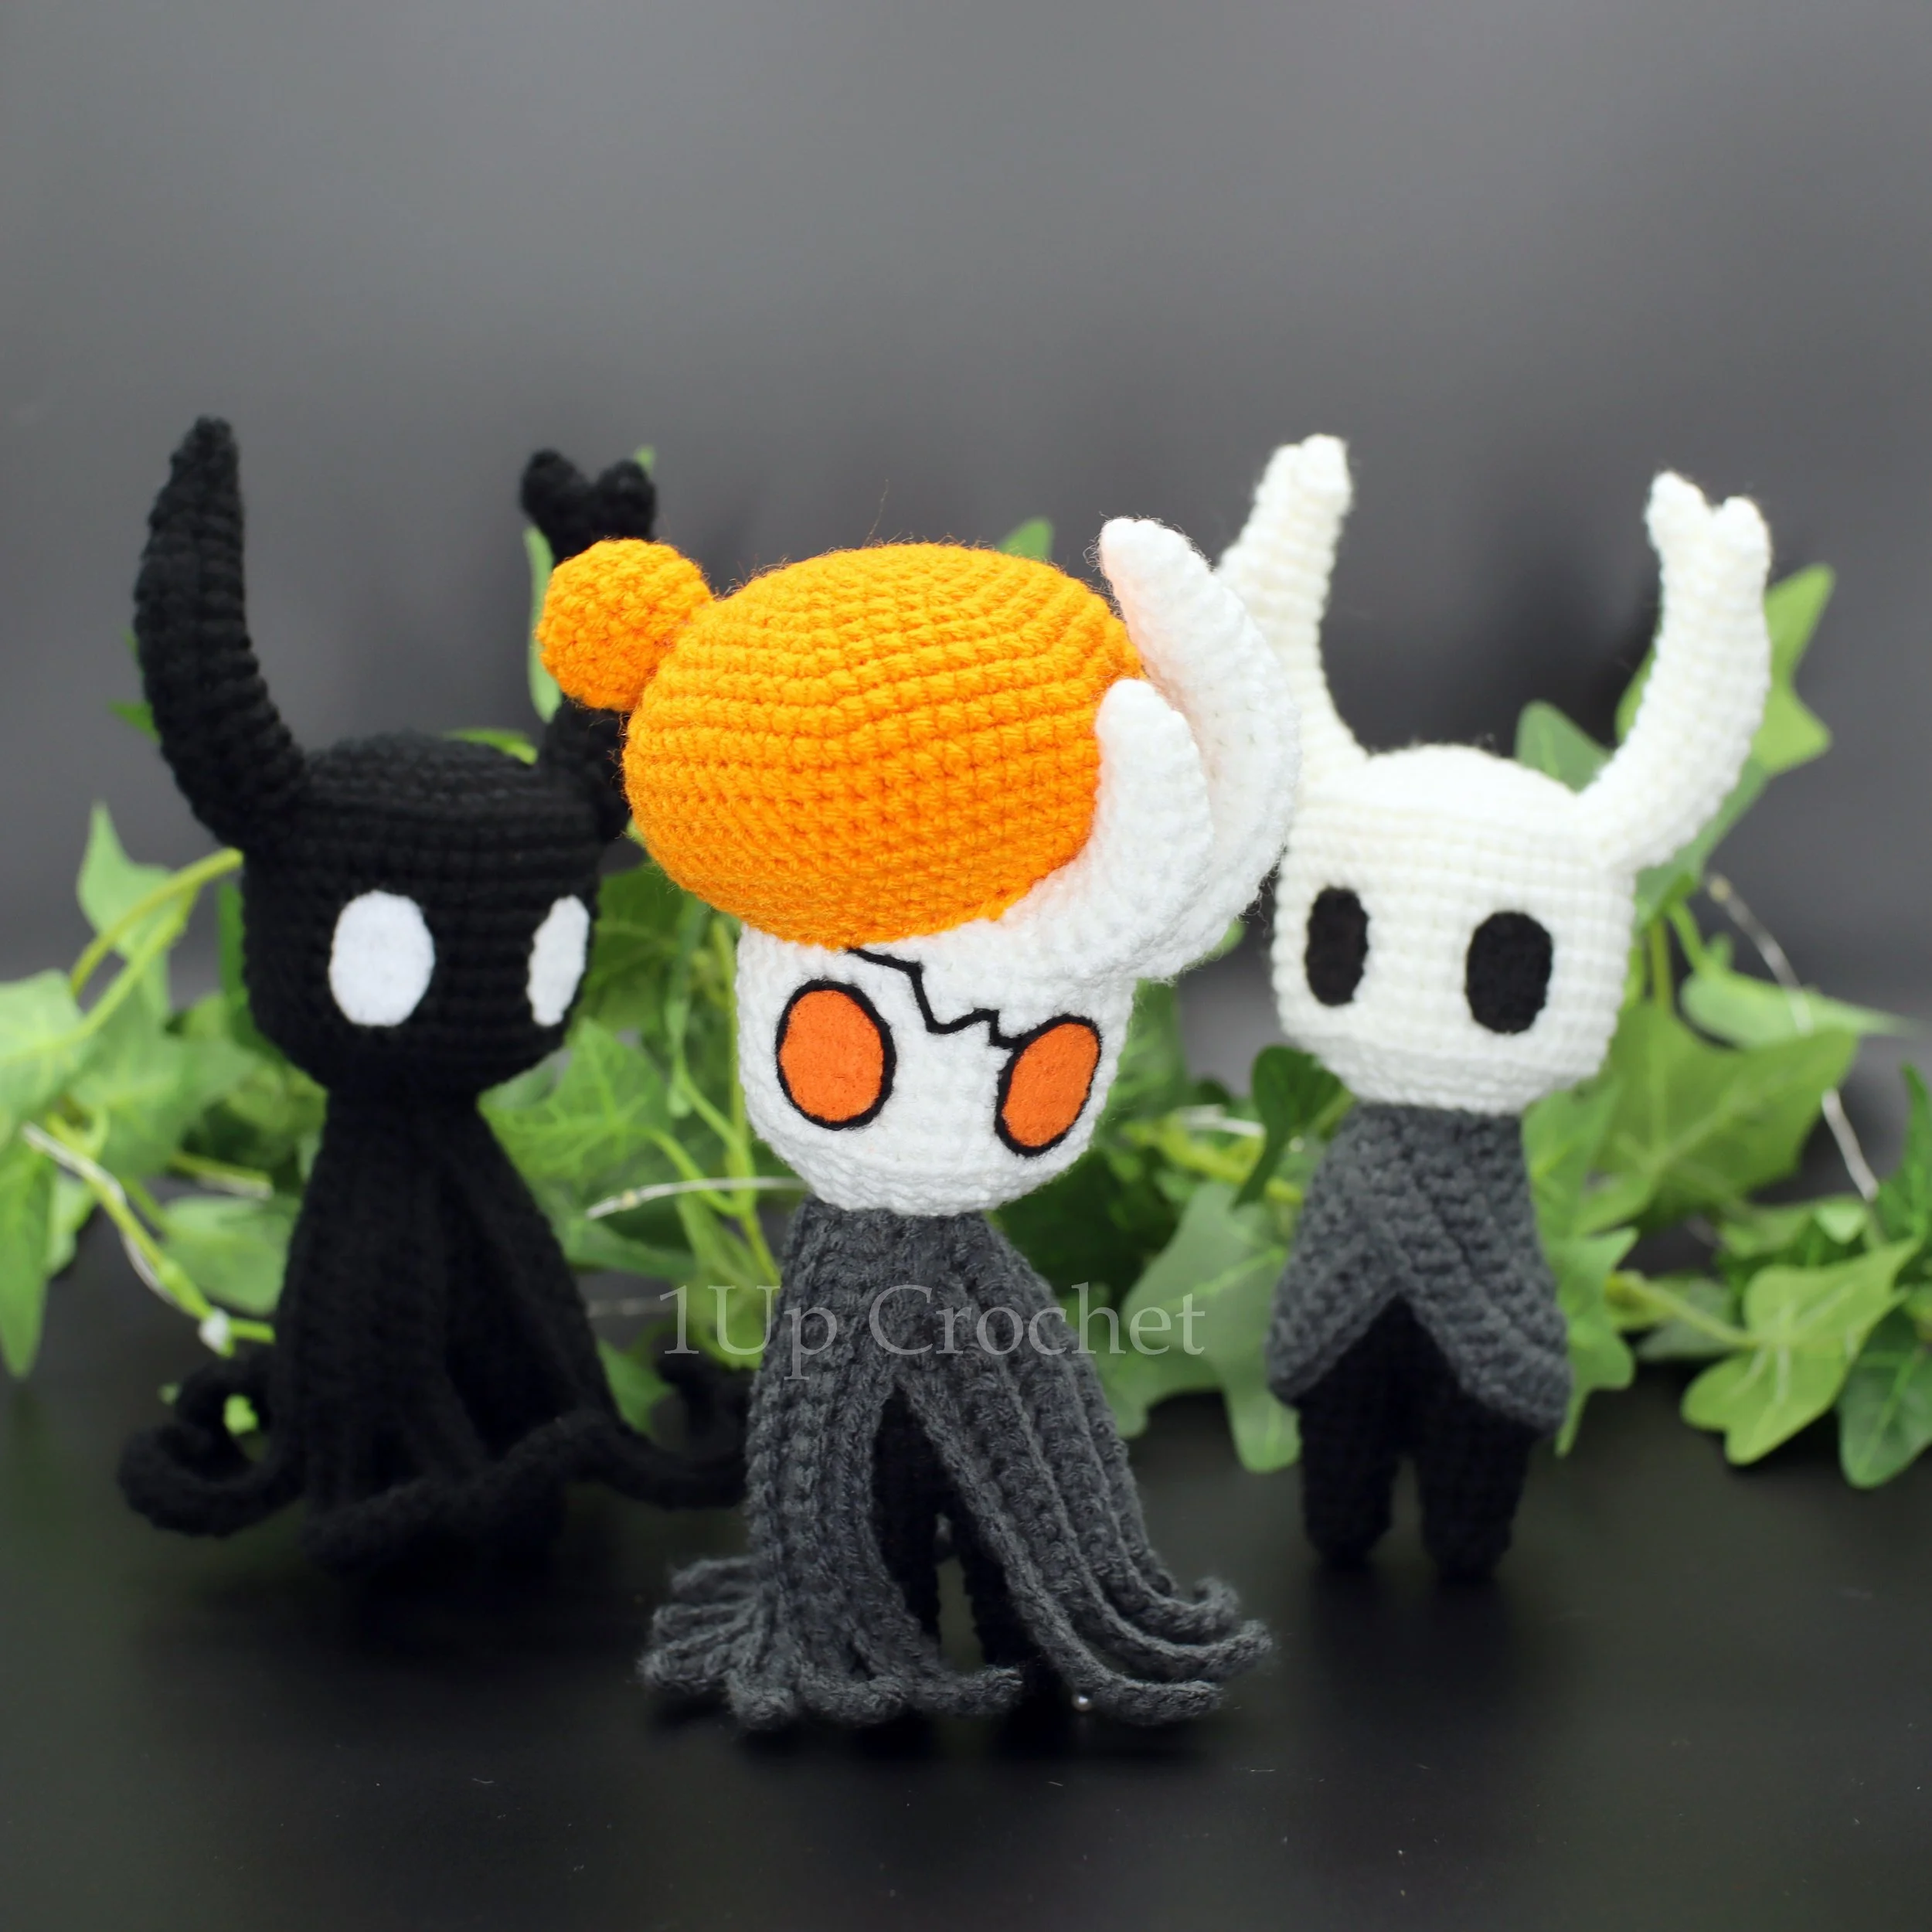
Free Hollow Knight Inspired Broken Vessel Amigurumi Pattern
By 1Up Crochet
-
-While making this amigurumi you will work in continuous rounds, unless told otherwise. Use a stitch marker to mark the end of your rounds.
-The finished amigurumi should measure approximately 8.5 inches tall in. Size may vary, depending on yarn type and personal yarn tension.
-Instructions that need to be repeated will be marked with brackets followed by the number of times it needs to be repeated.
Example:
Rnd 4) [2 sc, inc] 6 times—24
-
[This pattern uses Worsted Weight 4-Medium Yarn]
All colors from Red Heart Super Saver:
-White
-Black
-Charcoal
-Pumpkin
-
Black
Orange
-
E Hook (3.5 mm)
Scissors
Yarn Needle
Fiber-Fil Stuffing
Hot Glue -or- Felting Needle to apply felt eyes
Important Information
You may not claim this pattern as your own. You may not alter, copy, sell, or redistribute this pattern in whole or in part.
This pattern is intended for personal use only.
If you publish photos of items made from this pattern, I ask that you please give me credit as the original designer of the pattern. It's always a good idea to give credit where credit is due.
I DID NOT CREATE THIS CHARACTER. Broken Vessel IS THE PROPERTY TEAM CHERRY. THIS PATTERN IS NOT AFFILIATED WITH, ENDORSED BY, OR SPONSORED BY TEAM CHERRY. THIS PATTERN IS NOT BRANDED AS ANYTHING AFFILIATED WITH SAID FRANCHISE.
Abbreviations
sc= single crochet
dc = double crochet
inc = increase (2 sc in the next stitch)
dec = invisible decrease (sc 2 together)
ch = chain
sl st = slip stitch
rep = repeat
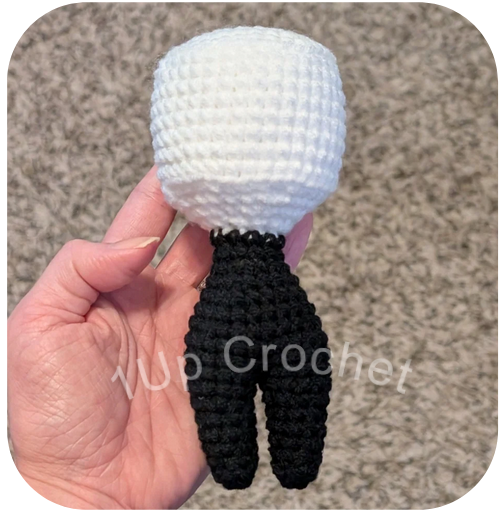
Head
Use White.
Rnd 1) 6 sc in magic ring—6
Rnd 2) Inc each sc around—12
Rnd 3) [1 sc, inc] 6 times—18
Rnd 4) [2 sc, inc] 6 times—24
Rnd 5) [3 sc, inc] 6 times—30
Rnd 6) [4 sc, inc] 6 times—36
Rnd 7) Sc in BLO of each sc around—36
Rnd 8) – Rnd 14) Sc in each sc around—36
Rnd 15) Work entire rnd in BLO: [4 sc, dec] 6 times—30
Rnd 16) [3 sc, dec] 6 times—24
Rnd 17) [2 sc, dec] 6 times—18
Rnd 18) [1 sc, dec] 6 times—12
Make a sl st in the next sc and fasten off. Leave a long tail for sewing and stuff the head.
Short Horn
Use White.
Rnd 1) 6 sc in magic ring—6
Rnd 2) Sc in each sc around—6
Rnd 3) Sc in each sc around—6
Rnd 4) [1 sc, inc] 3 times—9
Rnd 5) Sc in each sc around—9
Rnd 6) 6 sc, 3 hdc—9
Rnd 7) 5 sc, 4 hdc—9
Rnd 8) 5 sc, 4 hdc—9
Rnd 9) 4 sc, 5 hdc—9
Rnd 10) 4 sc, 5 hdc—9
Make a sc in the next st, then a sl st in the next st, then fasten off. Leave a long tail for sewing. Stuff the short horn.
Long Horn
Use White.
Rnd 1) 6 sc in magic ring—6
Rnd 2) Sc in each sc around—6
Rnd 3) Sc in each sc around—6
Rnd 4) [1 sc, inc] 3 times—9
Rnd 5) Sc in each sc around—9
Rnd 6) 6 sc, 3 hdc—9
Rnd 7) 5 sc, 4 hdc—9
Rnd 8) 5 sc, 4 hdc—9
Rnd 9) 4 sc, 5 hdc—9
Rnd 10) – Rnd 14) 4 sc, 5 hdc—9
Make a sc in the next st, then a sl st in the next st, then fasten off. Leave a long tail for sewing. Stuff the long horn.
If your horn is too spiraled, twist it in the opposite direction to straighten it out.
Legs (make 2)
Use Black.
Rnd 1) 6 sc in magic ring—6
Rnd 2) Sc in each sc around—6
Rnd 3) Sc in each sc around—6
Rnd 4) [1 sc, inc] 3 times—9
Rnd 5) Sc in each sc around—9
Rnd 6) Sc in each sc around—9
Rnd 7) [2 sc, inc] 3 times—12
Rnd 8) Sc in each sc around—12
For the first leg, make a slip stitch in the next stitch and fasten off. Stuff the leg.
For the second leg, do not fasten off yet! Leave your work on your hook.

Body
To form the body, we will join the two legs together, crocheting them into one piece. With the 2nd leg still on your hook, insert your hook through the last stitch made on the 1st leg and make a sc stitch. This will join the two legs together. Continue to crochet around both legs. See images above for guidance.
Rnd 9) Sc in each sc around both legs—24
Rnd 10) Sc in each sc around—24
Rnd 11) Sc in each sc around—24
Rnd 12) [6 sc, dec] 3 times—21
Rnd 13) Sc in each sc around—21
Rnd 14) [5 sc, dec] 3 times—18
Rnd 15) [4 sc, dec] 3 times—15
Rnd 16) [3 sc, dec] 3 times—12
Rnd 17) Sc in each sc around—12
Make a sl st in the next sc and fasten off. Leave a long tail for sewing and stuff the body.
Large Infection Bubble
Use Pumpkin.
Rnd 1) 6 sc in magic ring—6
Rnd 2) Inc each sc around—12
Rnd 3) [1 sc, inc] 6 times—18
Rnd 4) [2 sc, inc] 6 times—24
Rnd 5) [3 sc, inc] 6 times—30
Rnd 6) [4 sc, inc] 6 times—36
Rnd 7) [5 sc, inc] 6 times—42
Rnd 8) [6 sc, inc] 6 times—48
Rnd 9) [7 sc, inc] 6 times—54
Rnd 10) – Rnd 14) sc in each sc around—54
Rnd 15) [7 sc, dec] 6 times—48
Rnd 16) [6 sc, dec] 6 times—42
Rnd 17) [5 sc, dec] 6 times—36
Make a sl st in the next sc, then fasten off. Leave a long tail for sewing. Stuff the Infection bubble.
Small Infection Bubble
Use Pumpkin.
Rnd 1) 6 sc in magic ring—6
Rnd 2) Inc each sc around—12
Rnd 3) [1 sc, inc] 6 times—18
Rnd 4) Sc in each sc around—18
Rnd 5) Sc in each sc around—28
Rnd 6) [1 sc, dec] 6 times—12
Make a sl st in the next sc, then fasten off. Leave a long tail for sewing. Stuff the infection bubble.
Cloak (make 2)
Use Charcoal.
Chain 21.
Row 1) Sl st in 2nd ch from hook, sc in each ch across—20 sts
Row 2) Sc in BLO of next 13 sts, ch 8— 13 sts, 8 ch’s
Row 3) Sl st in 2nd ch from hook, sc in next 6 ch’s, sc in BLO of next 13 sc—20 sts
Row 4) Sc in BLO of next 13 sts, ch 8— 13 sts, 8 ch’s
Row 5) Sl st in 2nd ch from hook, sc in next 6 ch’s, sc in BLO of next 13 sc—20 sts
Row 6) Sc in BLO of next 13 sts, ch 8— 13 sts, 8 ch’s
Row 7) Sl st in 2nd ch from hook, sc in next 6 ch’s, sc in BLO of next 13 sc—20 sts
Row 8) Sc in BLO of next 13 sts, ch 8— 13 sts, 8 ch’s
Row 9) Sl st in 2nd ch from hook, sc in next 6 ch’s, sc in BLO of next 13 sc—20 sts
Row 10) Sc in BLO of next 13 sts, ch 8— 13 sts, 8 ch’s
Row 11) Sl st in 2nd ch from hook, sc in next 6 ch’s, sc in BLO of next 13 sc—20 sts
Fasten off and leave a long tail for sewing.
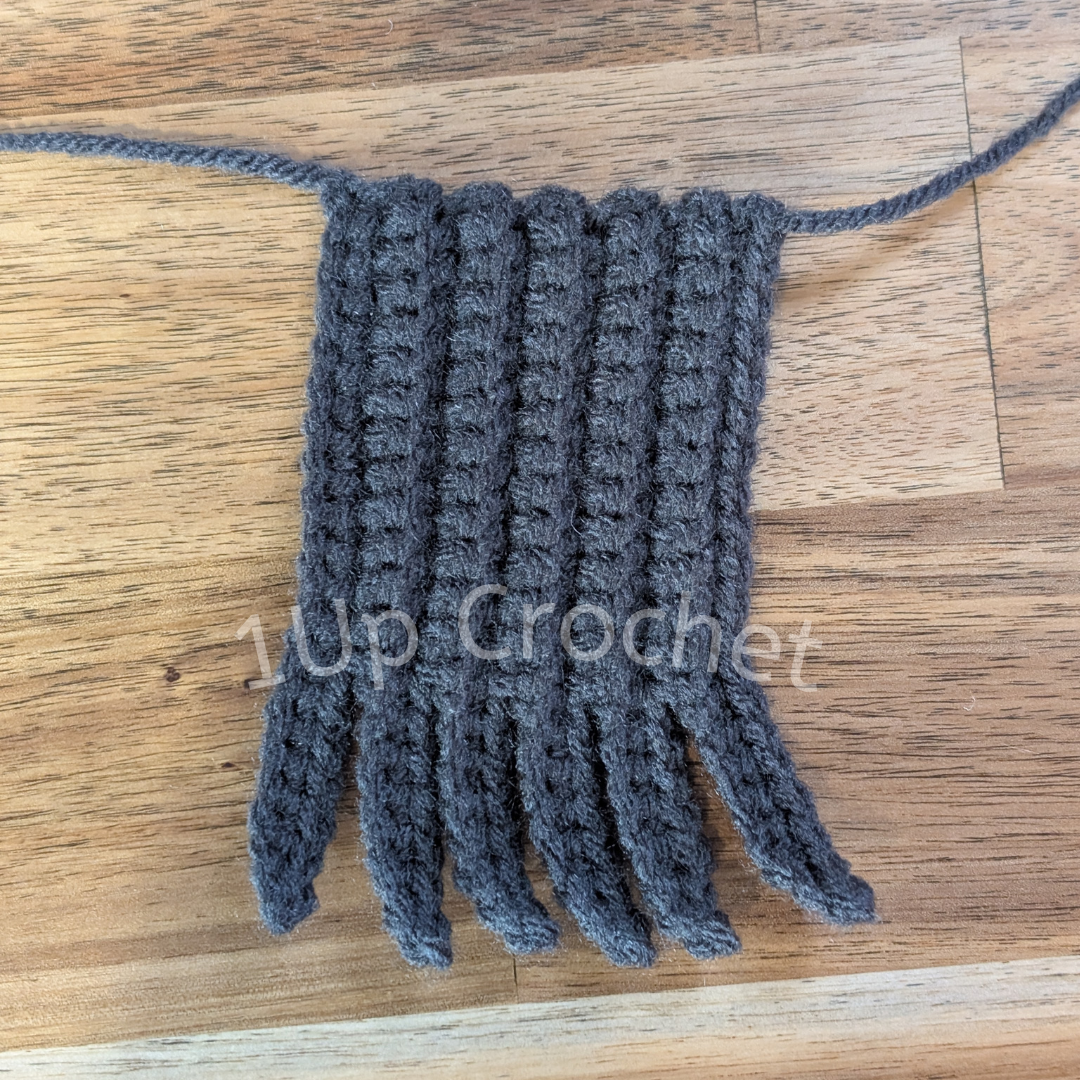
Finished Cloak.
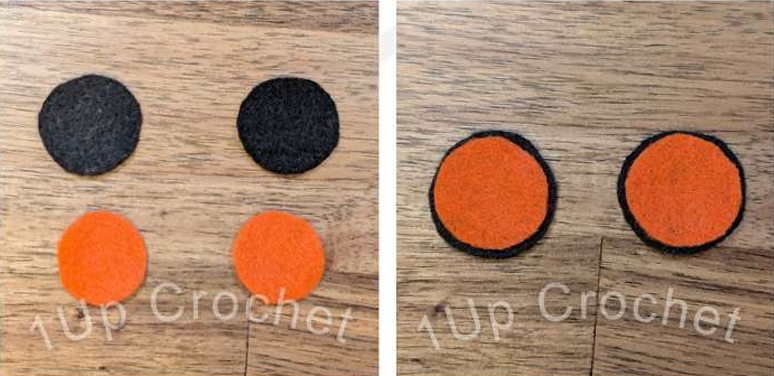
Eyes From Felt
From a sheet of black craft felt, cut out two small circles that are approximately 1 inch in diameter.
From a sheet of orange craft felt, cut out two small circles that are slightly smaller than the black circles so that when they are layered over the black, you can see a small outline of black.
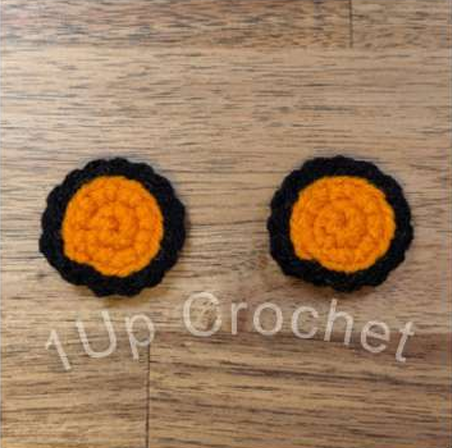
Crocheted Eyes
Use Pumpkin and Black. Start with Pumpkin.
Rnd 1) 7 sc in magic ring—7
Rnd 2) inc in each sc around—14
Change color to black.
Rnd 3) sl st in BLO of each sc around—14
Fasten off.
If you prefer to sew the eyes on, leave a long tail for sewing. Gluing the eyes on will help preserve the clean line between the orange and black colors. Use whichever application method you prefer during assembly.
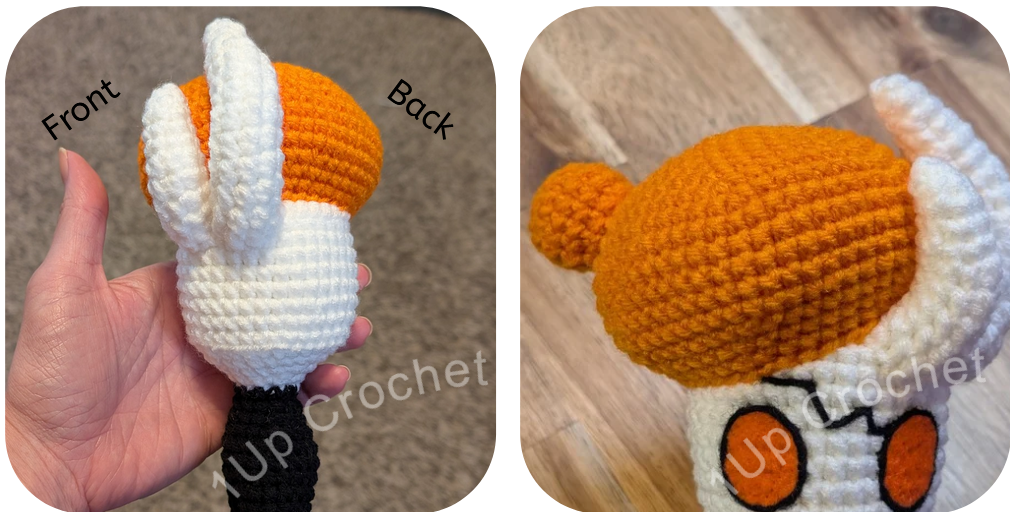
Assembly
Sew the open end of the head to the open end of the body.

2. Sew the large infection bubble to the head. Rather than sewing it directly to the top, sew it on at a slight angle, leaning to the left.

3. Imagine a center line running down the middle of the head/body. Sew the short horn slightly to the right of the center. The curve of the horn should contour along the infection bubble. Then sew the large horn directly to the right of the short horn
4. Sew the small infection bubble on the left side of the large infection bubble, opposite of the horns.

5. Wrap one of the cloaks snuggly around the right side of the body and sew around the neck as needed. Do the same with the other cloak on the left side of the body. There should be some overlap.

6. Apply the eyes to the front of the head. The left eye should sit beneath the left short horn.
7. Extra Detail: Use your yarn needle with the black yarn, or black embroidery floss, and embroider a jagged line between the left eye and the top of the head to create a crack.
Tip: If you feel the yarn makes too thick of a line, you can split the yarn for a thinner thread!

Finished Images
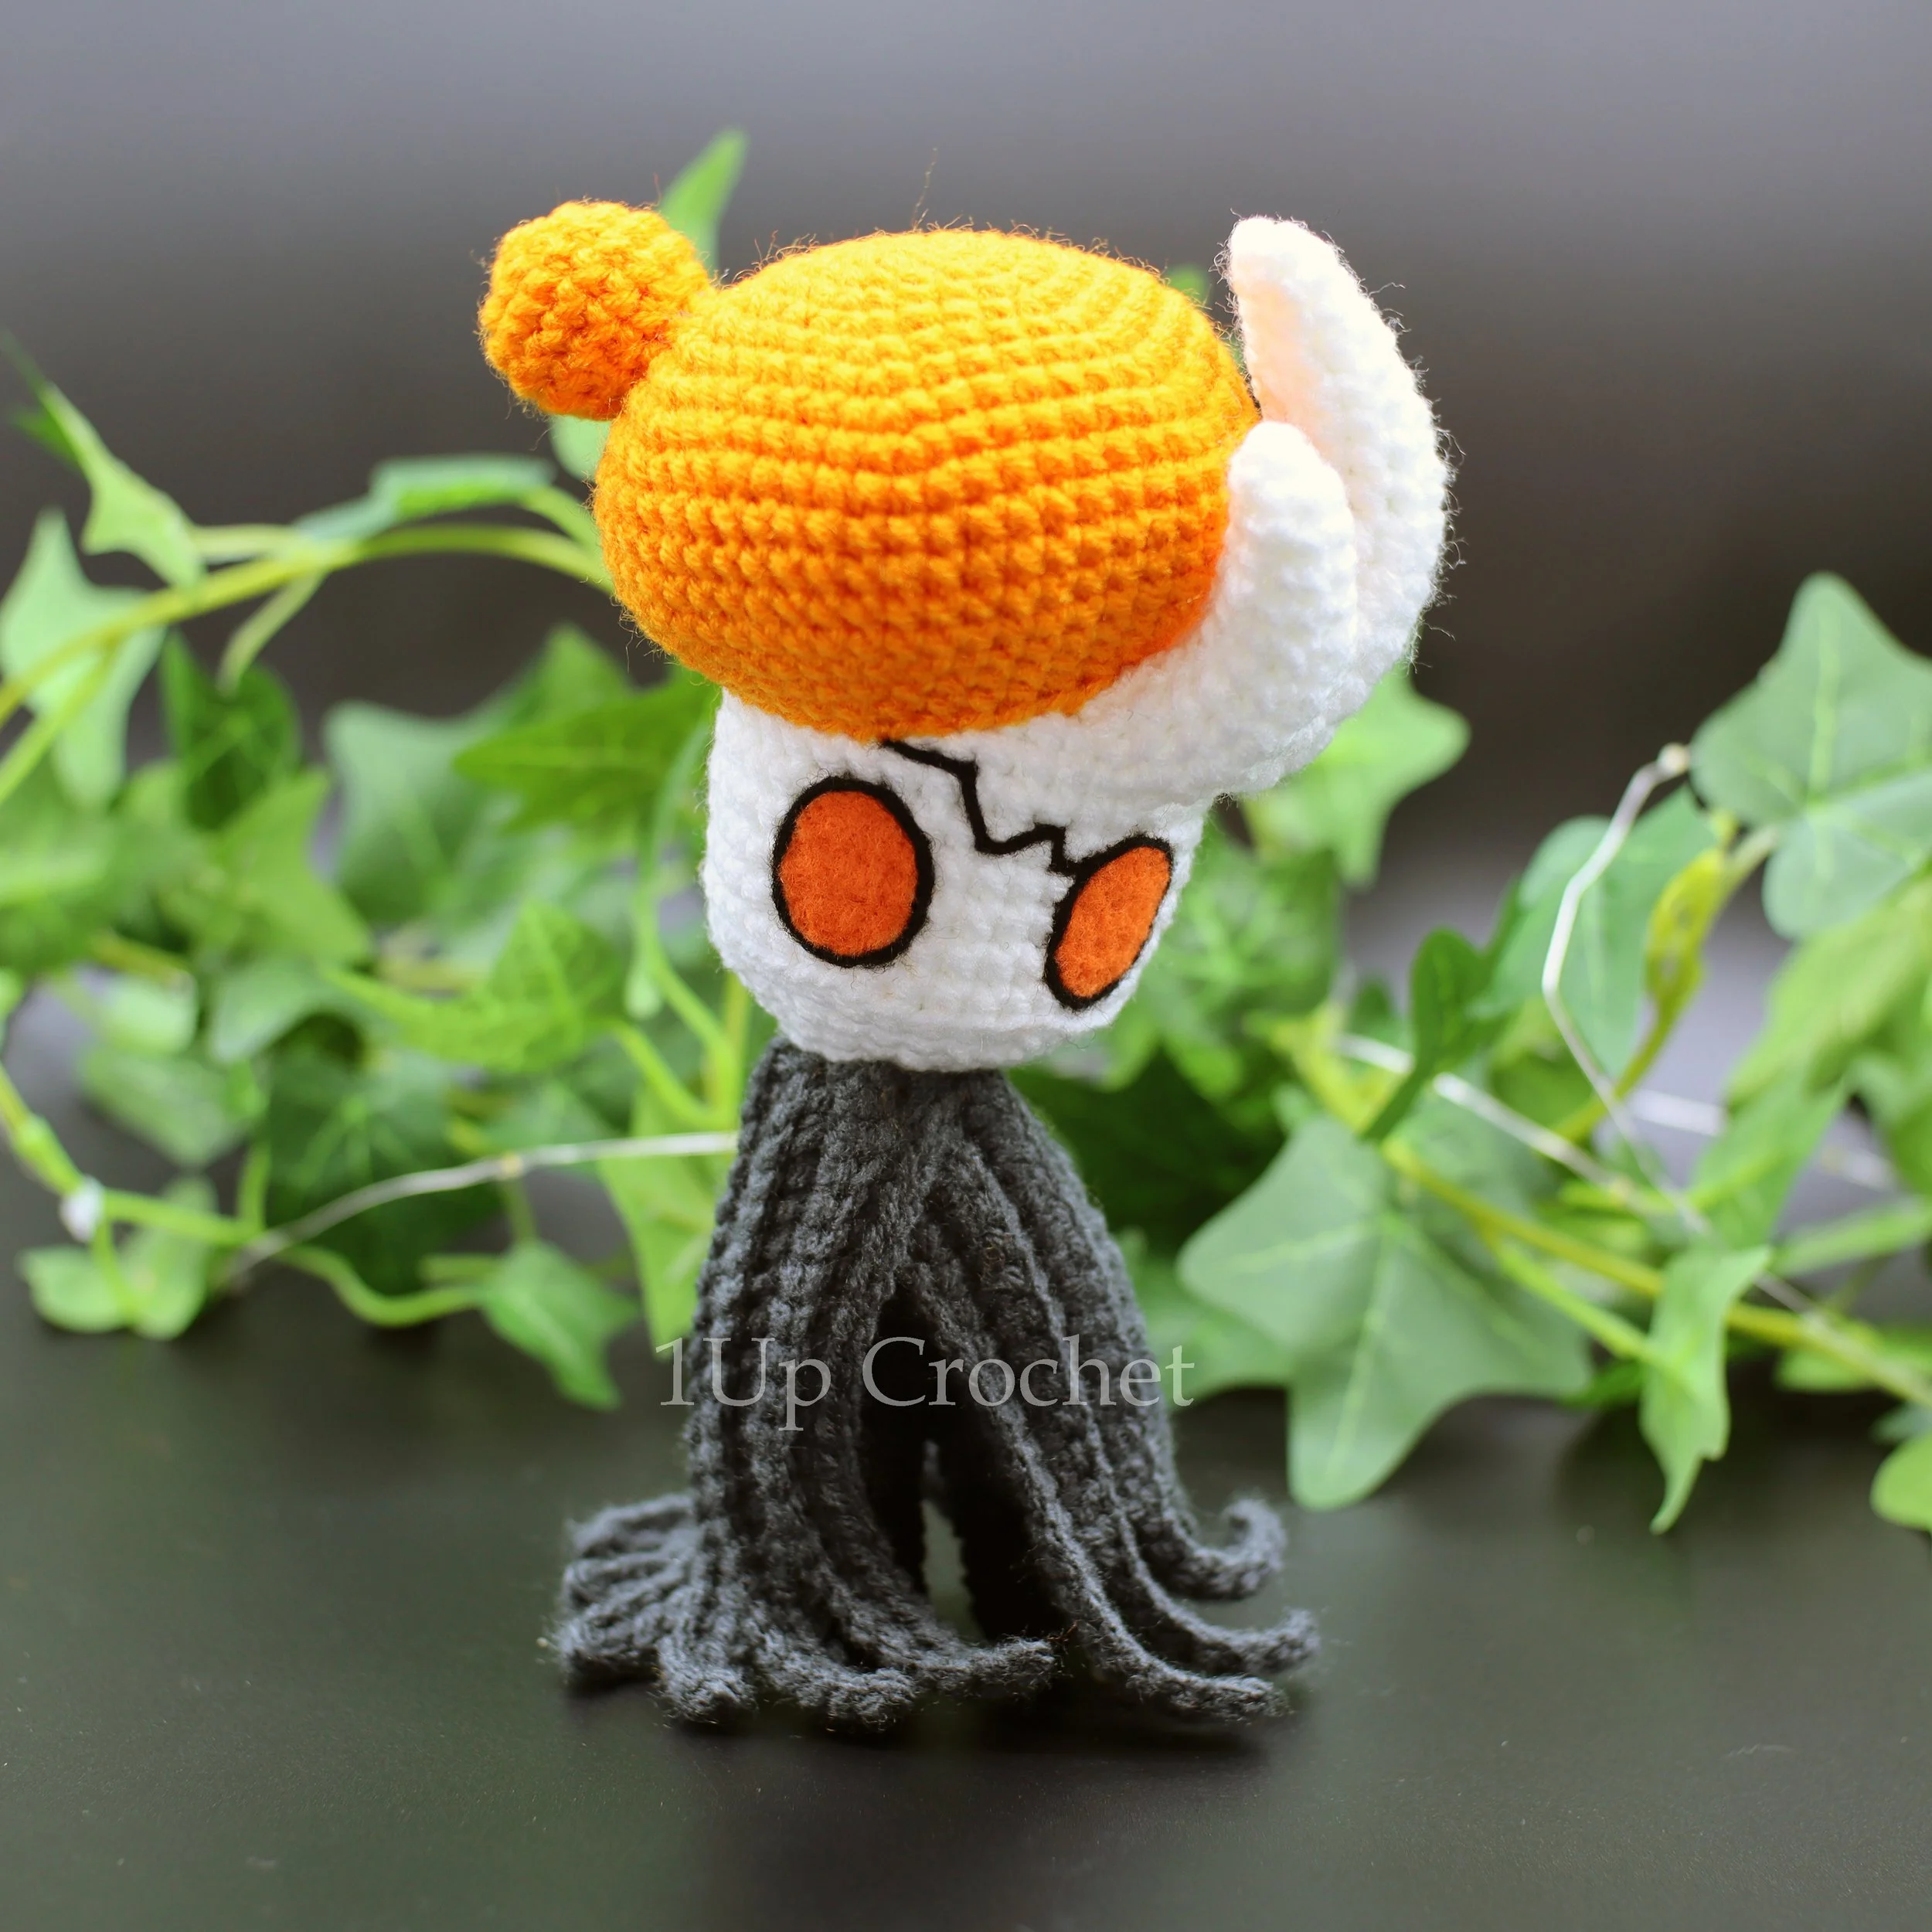
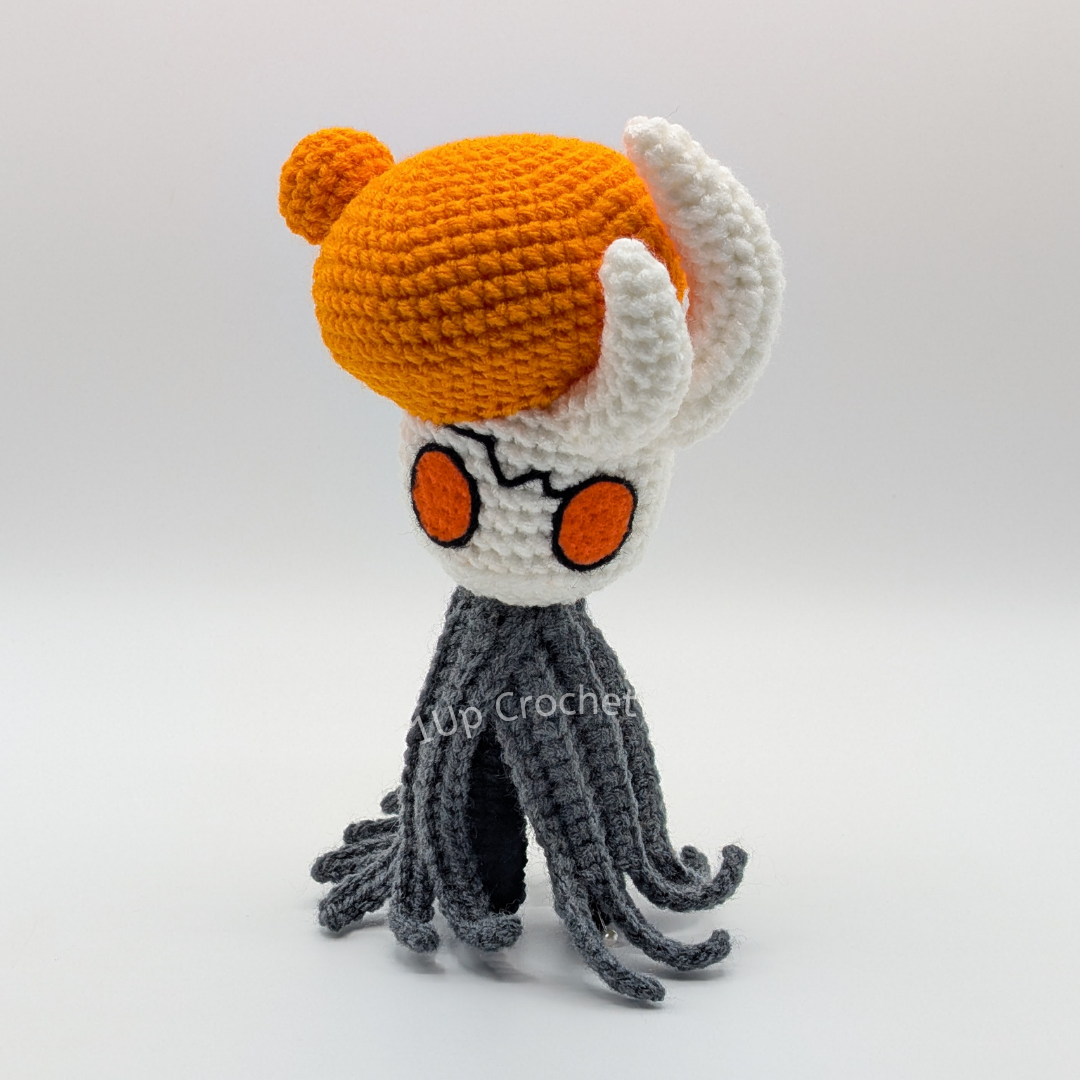
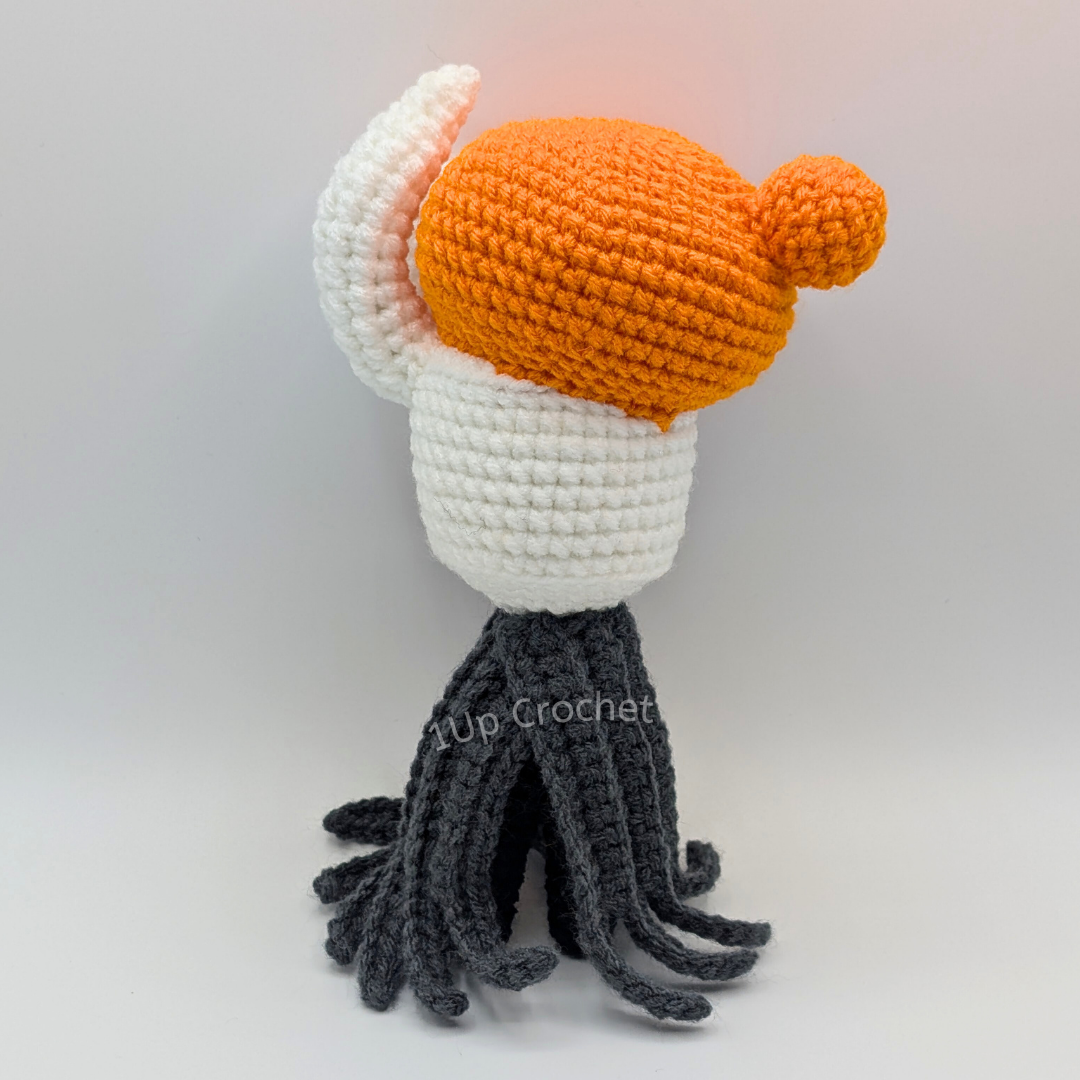
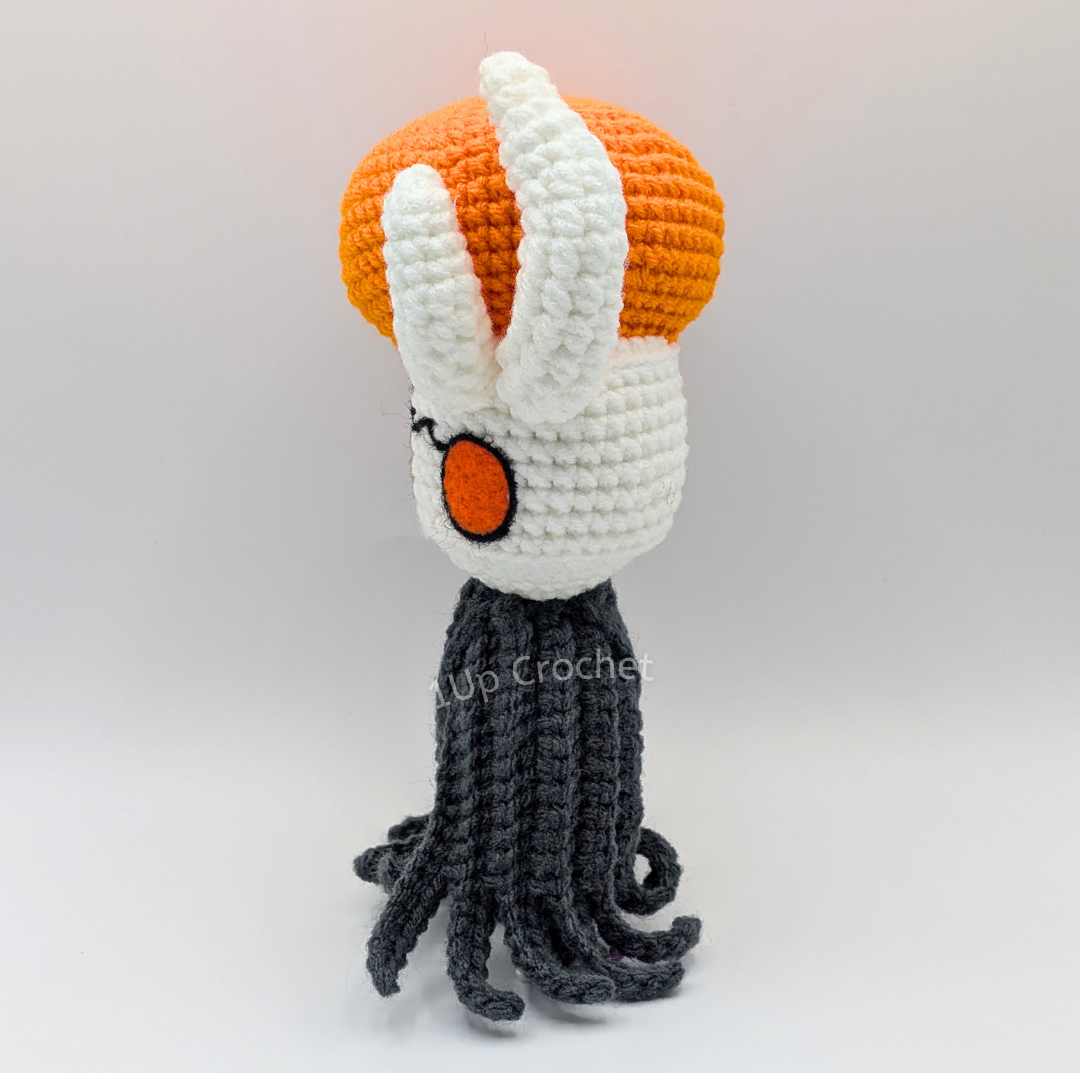
Thanks for checking out my pattern!
I’d LOVE to see your work too! Shout out to me on social media with #1upcrochet and show me pictures of your completed projects!