

Free Little Beanie Penguin Amigurumi Pattern
By 1Up Crochet

-
-While making this amigurumi you will work in continuous rounds, unless told otherwise. Use a stitch marker to mark the end of your rounds.
-The finished amigurumi should measure approximately 6 inches tall. Size may vary, depending on yarn type and personal yarn tension.
-Instructions that need to be repeated will be marked with brackets followed by the number of times it needs to be repeated.
Example:
Rnd 4) [2 sc, inc] 6 times—24
-
[This pattern uses Worsted Weight 4-Medium Yarn]
-Black
-White
-Gold
-Gray
-Color of your choice for the Beanie
-
3.5 mm hook
Black Craft Felt
White Craft Felt
Scissors
Yarn Needle
Fiber-Fil Stuffing
Glue or Felting Needle (for applying the eyes)
Important Information
You may not claim this pattern as your own. You may not alter, copy, sell, or redistribute this pattern in whole or in part.
This pattern is intended for personal use only.
If you publish photos of items made from this pattern, I ask that you please give me credit as the original designer of the pattern. It's always a good idea to give credit where credit is due.
Abbreviations
sc= single crochet
inc = increase (2 sc in the next st)
dec = invisible decrease
ch = chain
st = stitch
sl st = slip stitch
Head/Body
Use White, Black, and Gray.
Start with Black.
Rnd 1) 6 sc in magic ring—6
Rnd 2) Inc in each sc around—12
Rnd 3) [1 sc, inc] 6 times—18
Rnd 4) [2 sc, inc] 6 times—24
Rnd 5) [3 sc, inc] 6 times—30
Rnd 6) [4 sc, inc] 6 times—36
Rnd 7) 3 sc, cc to White, 3 sc, cc to Black, 6 sc, cc to White, 3 sc, cc to Black, 21 sc—36
Rnd 8) 2 sc, cc to White, 5 sc, cc to Black, 4 sc, cc to White, 5 sc, cc to Black, 20 sc—36
Rnd 9) 1 sc, cc to White, 7 sc, cc to Black, 2 sc, cc to White, 7 sc, cc to Black, 19 sc—36
Rnd 10) Cc to White, 8 sc, cc to Black, 2 sc, cc to White, 8 sc, cc to Black, 18 sc—36
Rnd 11) Cc to White, 8 sc, cc to Black, 2 sc, cc to White, 8 sc, cc to Black, 18 sc—36
Rnd 12) Cc to White, 8 sc, cc to Black, 2 sc, cc to White, 8 sc, cc to Black, 18 sc—36
Rnd 13) Cc to White, 11 sc, inc, 6 sc, cc to Black, 5 sc, inc, 11 sc, inc—39
CC to Gray
Rnd 14 - Rnd 16) Sc in each sc around—39
Rnd 17) [12 sc, inc] 3 times—42
Rnd 18 - Rnd 19) Sc in each sc around—42
Rnd 20) [13 sc, inc] 3 times—45
Rnd 21 - Rnd 22) Sc in each sc around—45
Rnd 23) [14 sc, inc] 3 times—48
Rnd 24 - Rnd 26) Sc in each sc around—48
Rnd 27) [6 sc, dec] 6 times—42
Rnd 28) [5 sc, dec] 6 times—36
Rnd 29) [4 sc, dec] 6 times—30
Rnd 30) [3 sc, dec] 6 times—24
Rnd 31) [2 sc, dec] 6 times—18
Rnd 32) [1 sc, dec] 6 times—12
Rnd 33) Dec 6 times—6
Finish stuffing and close off the opening.

Finished Head/Body
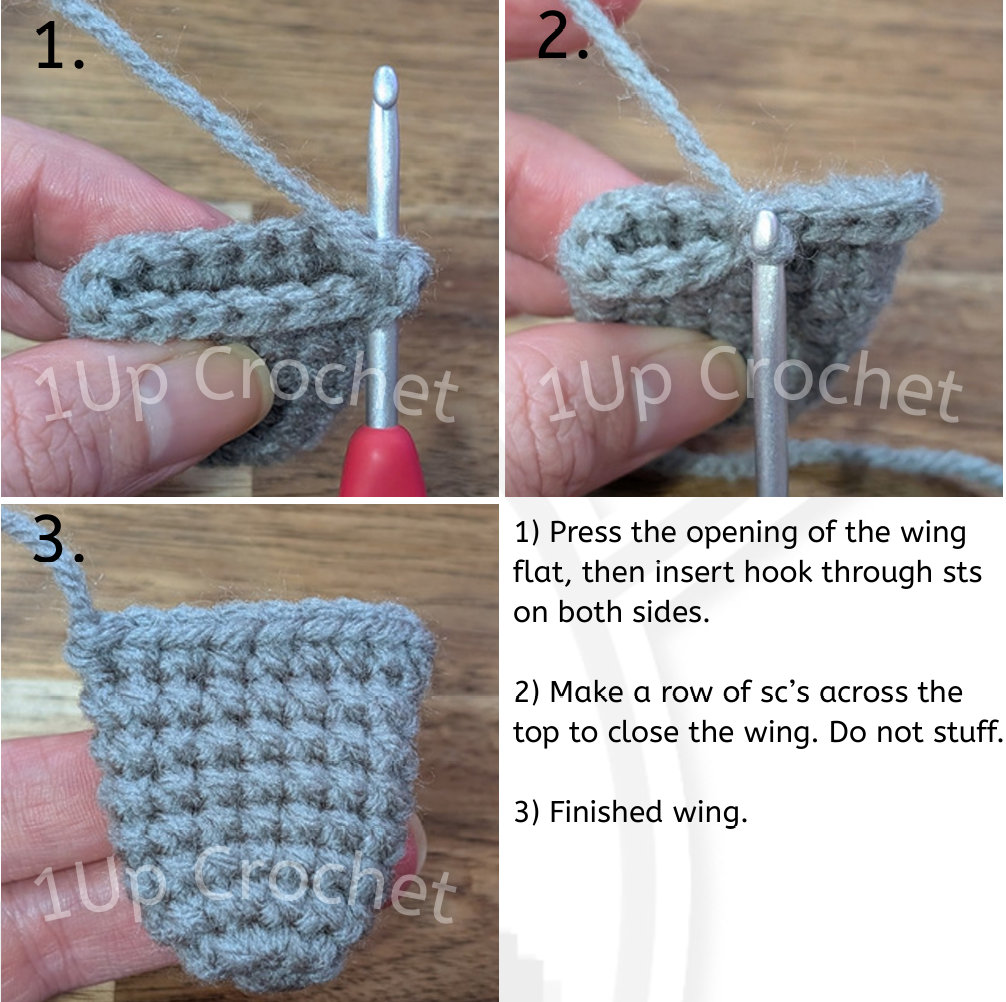
Wing (make 2)
Use Gray.
Rnd 1) 6 sc in magic ring—6
Rnd 2) Inc in each sc around—12
Rnd 3) [3 sc, inc] 3 times—15
Rnd 4 - Rnd 7) Sc in each sc around—15
Rnd 8) 14 sc, inc—16
Chain 1, then press the opening flat. Do not stuff. Insert hook through stitches on both sides and make a row of sc’s to the end.
See images below for guidance.
Foot(make 2)
Use Gold.
Rnd 1) 6 sc in magic ring—6
Rnd 2) Inc in each sc around—12
Rnd 3) Sc in each sc around
Rnd 4) Sc in each sc around
Rnd 5) Sc in each sc around
Chain 1, then press the opening flat. Do not stuff. Insert hook through stitches on both sides and make a row of sc’s to the end. (The same method that was used to close the wing.)
Tail
Use Gray.
Rnd 1) 6 sc in magic ring—6
Rnd 2) [1 sc, inc] rep 3 times—9
Rnd 3) [2 sc, inc] rep 3 times—12
Rnd 4) [3 sc, inc] rep 3 times—15
Make a sl st in the next sc and fasten off. Leave a long tail for sewing and stuff the tail.
Beak
Use Gold.
Rnd 1) 6 sc in magic ring—6
Rnd 2) [1 sc, inc] 3 times—9
Rnd 3) Sc in each sc around—9
Make a sl st in the next sc and fasten off. Stuff the beak. Leave a long tail for sewing.
Belly
Use White.
Rnd 1) 6 sc in magic ring—6
Rnd 2) Inc in each sc around—12
Rnd 3) [1 sc, inc] 6 times—18
Rnd 4) [2 sc, inc] 6 times—24
Rnd 5) [3 sc, inc] 6 times—30
Make a sl st in the next sc and fasten off. Leave a long tail for sewing.
Eyes
From a sheet of black craft felt, cut out two small circles approximately ½ inch in diameter.
From a sheet of white craft felt, cut out two smaller circles to make the eye highlights.
Beanie
Use the color of your choice for the beanie. (Color seen in photos is Red Heart Super Saver: Ocean.)
Rnd 1) 6 sc in magic ring—6
Rnd 2) Inc in each sc around—12
Rnd 3) [1 sc, inc] 6 times—18
Rnd 4) [2 sc, inc] 6 times—24
Rnd 5) [3 sc, inc] 6 times—30
Rnd 6) [4 sc, inc] 6 times—36
Rnd 7) [5 sc, inc] 6 times—42
Rnd 8) Sc in each sc around—42
Rnd 9 – Rnd 11) sc in each sc around—42
CC to White.
Rnd 12) sc in each sc around—42
Rnd 13) sc in FLO of each sc around—42
Rnd 14) sc in each sc around—42
Rnd 15) sc in each sc around—42
Fasten off and weave in the end.
Roll up the last 3 rounds of the beanie to create the brim.

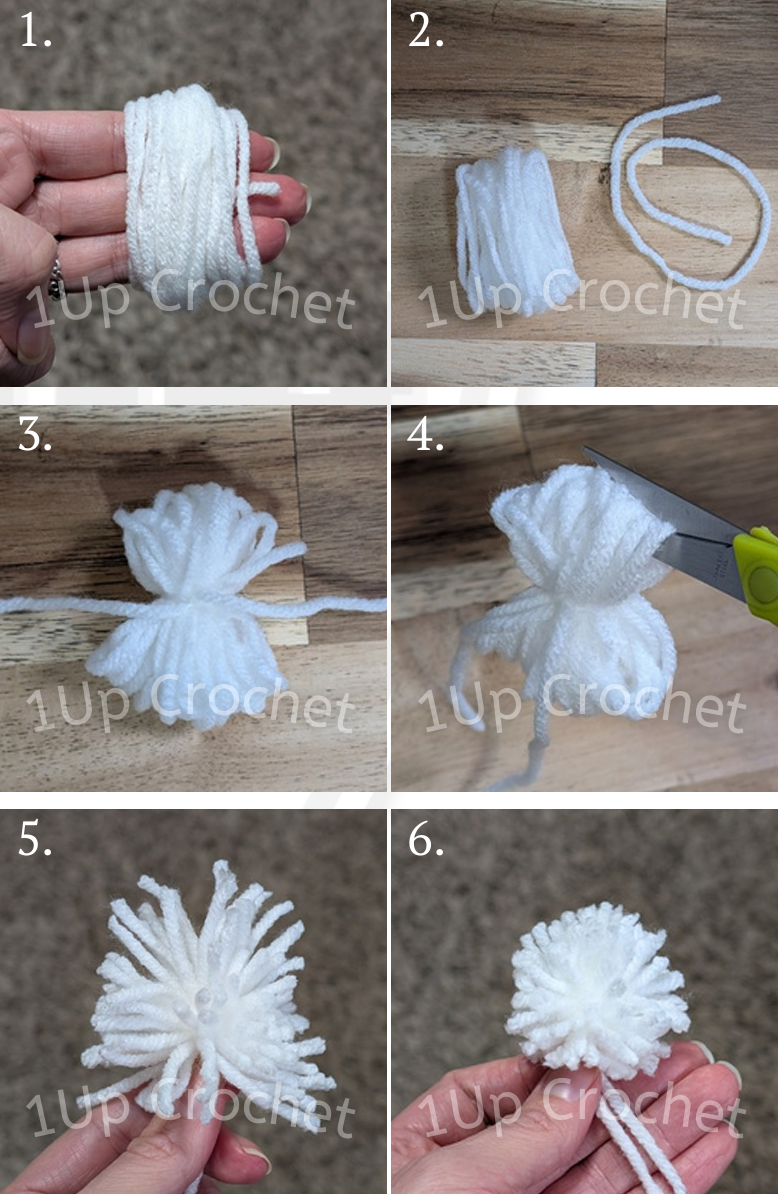
Pom Pom
To make a mini pom pom:
1) With yarn in White, wrap the yarn around 3 fingers many times, creating a small yarn spool. The more you wrap, the denser the pom pom will be.
2) Slip the yarn off your fingers. Cut a 10-inch long strand of yarn in the same color.
3) Take the long strand of yarn and tightly cinch the spool in the middle, then tie a knot to secure it.
4) With your scissors, cut all the loops on each side.
5) You pom pom will look uneven with many stands in varying lengths.
6) Use your scissors to trim up the pom pom, making it more spherical in shape. Be sure to keep the long strands from where you tied the securing knot. You will use these to sew the pom pom to the top of the beanie!
Assembly
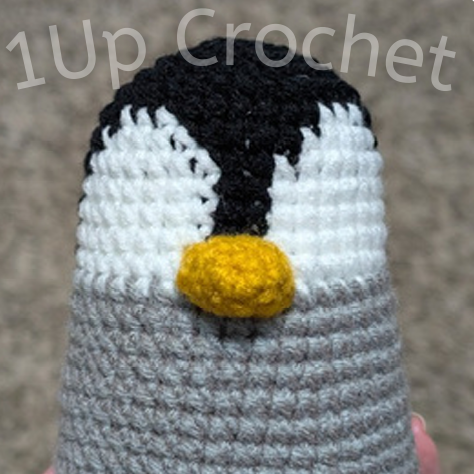
1) Sew the beak to the face from approx. Rnds 12-13 to Rnds 14-15.

2) Sew the wings to the side of the body approx. at the level of Rnds 15-16.

3) Sew the belly to the front of the body from approx. Rnds 17-18 to Rnds 26-27.

4) Sew the feet to the bottom of the body.

5) Sew the tail to the lower backside of the body.

6) Apply the eyes to the face. The bottoms of the eyes touch the top of Rnd 13 and are spaced 6 stitches apart.

7) Sew the Pom Pom to the top of the beanie. Sew, or glue, the beanie to the head. Add stuffing under the Pom Pom if needed.
Finished Pictures
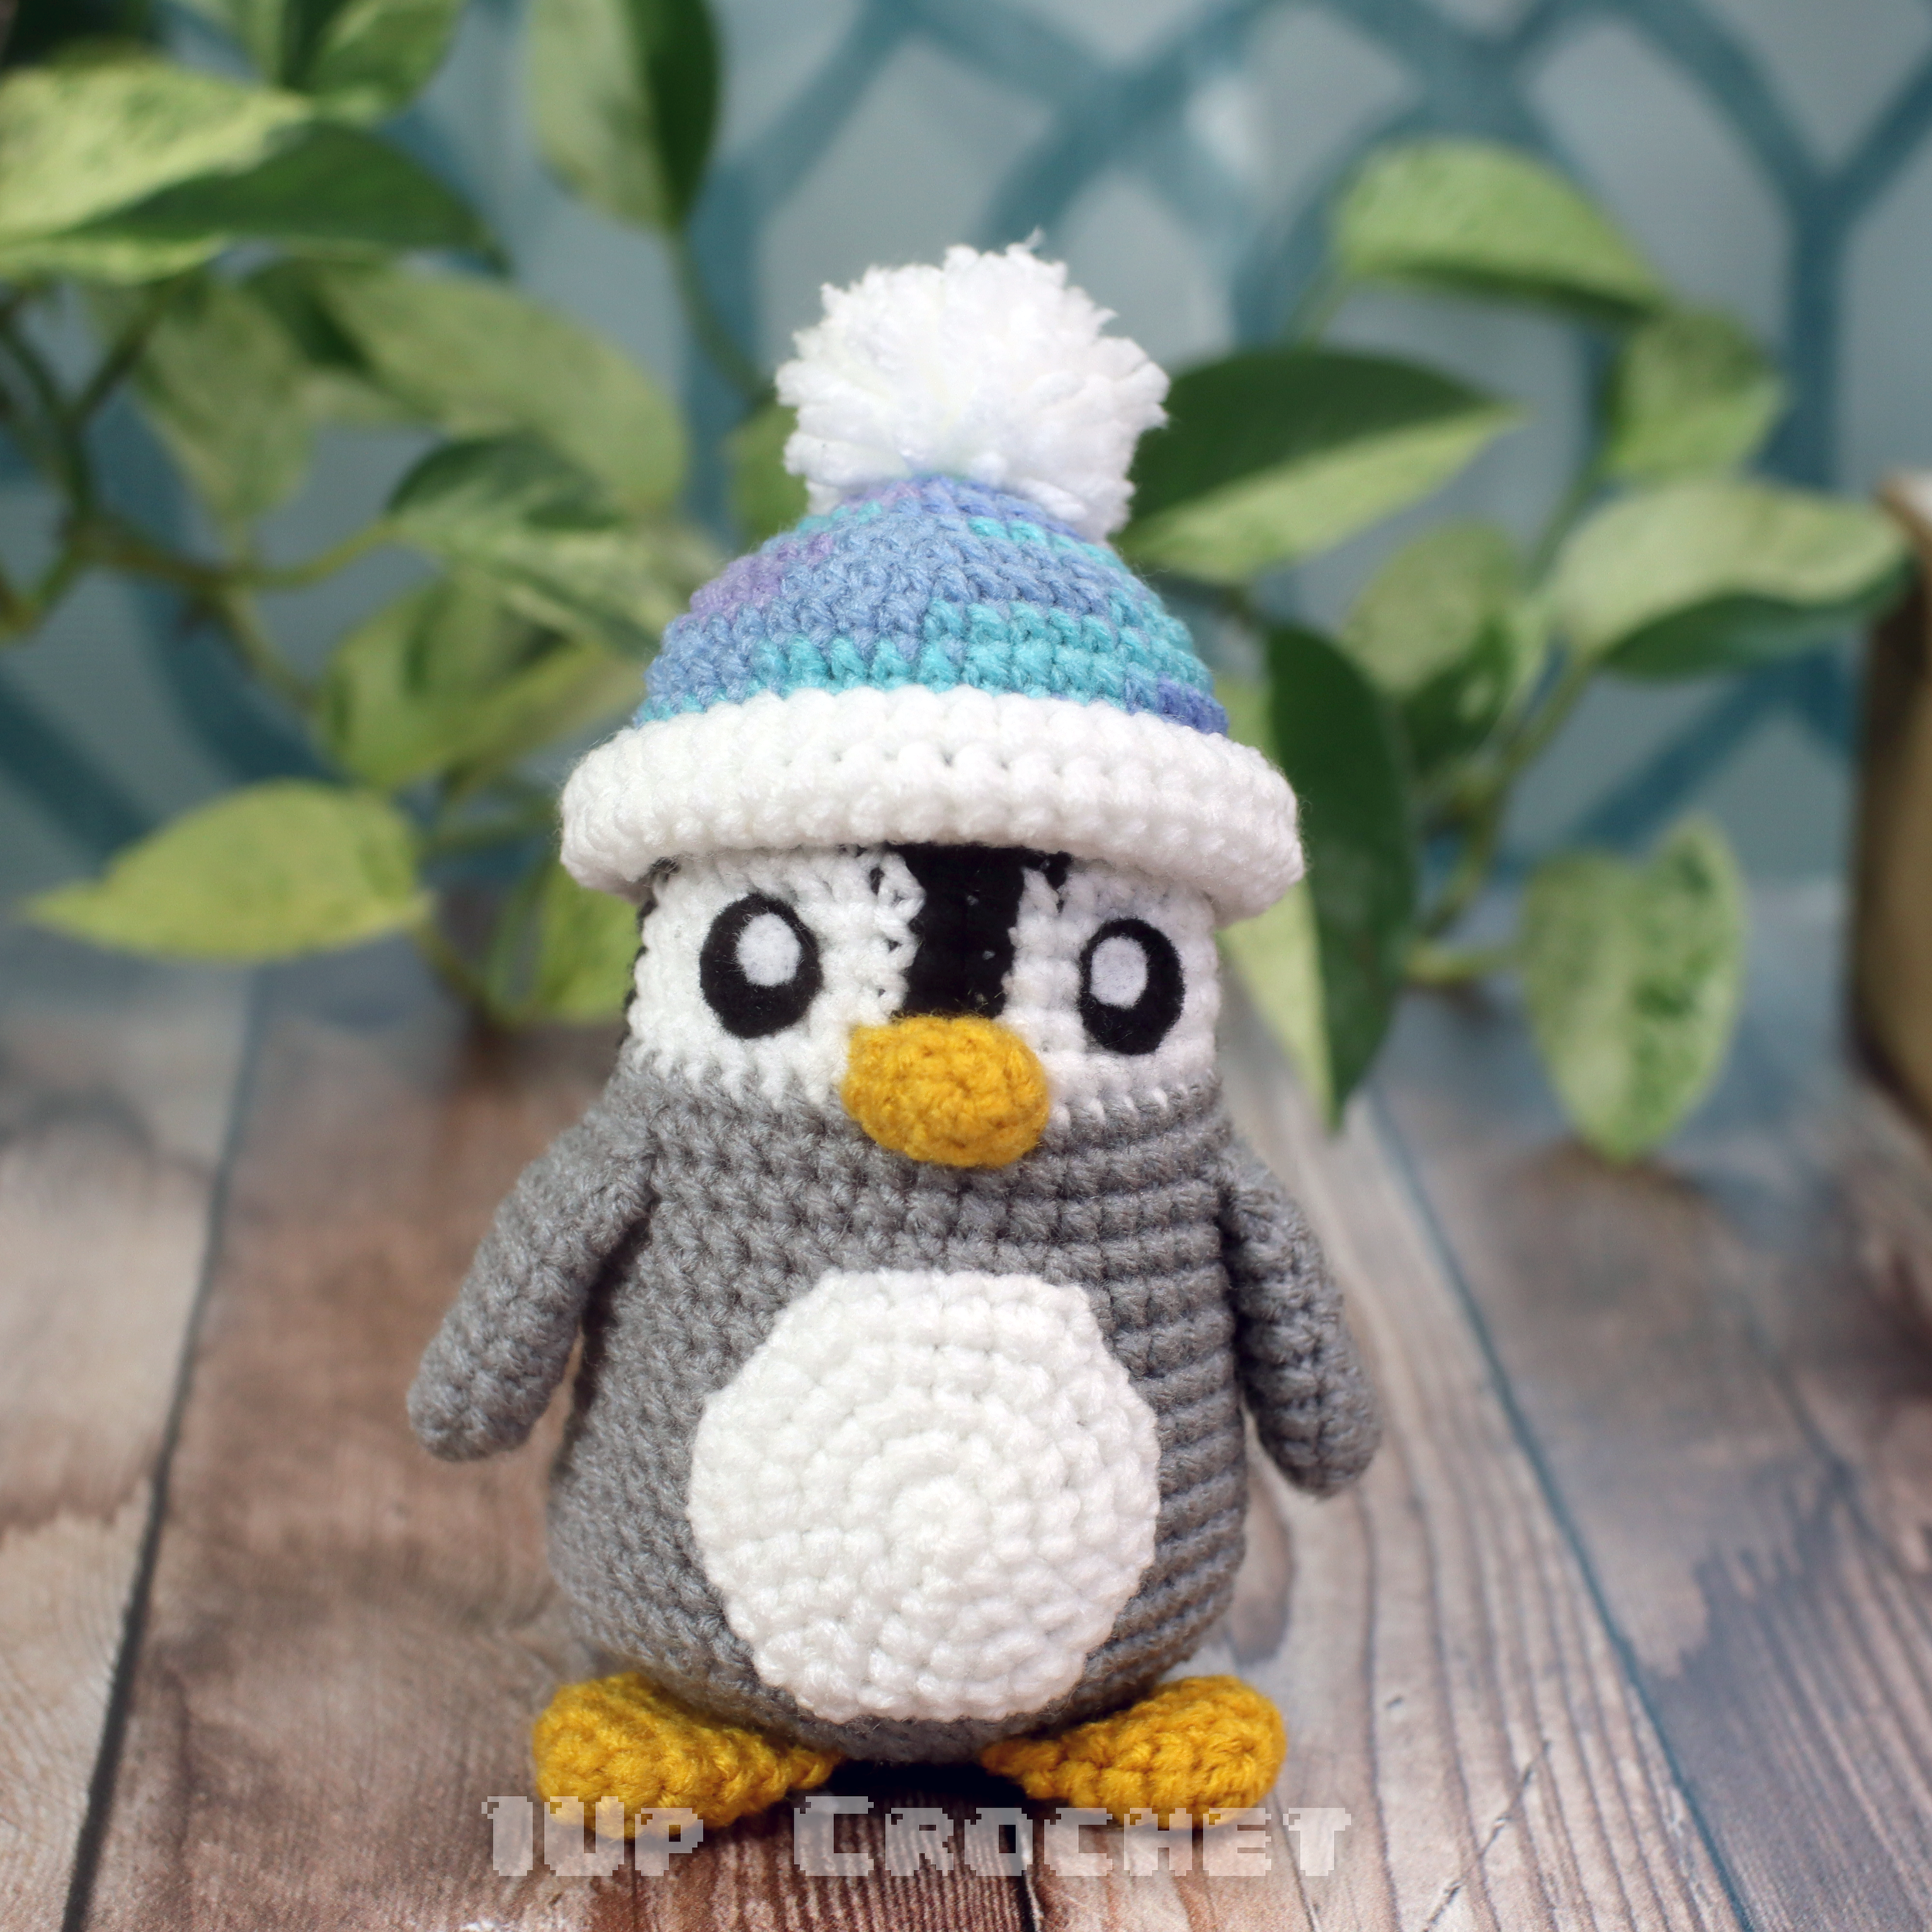

Thanks for checking out my pattern!
I’d LOVE to see your work too! Shout out to me on social media with #1upcrochet and show me pictures of your completed projects!