
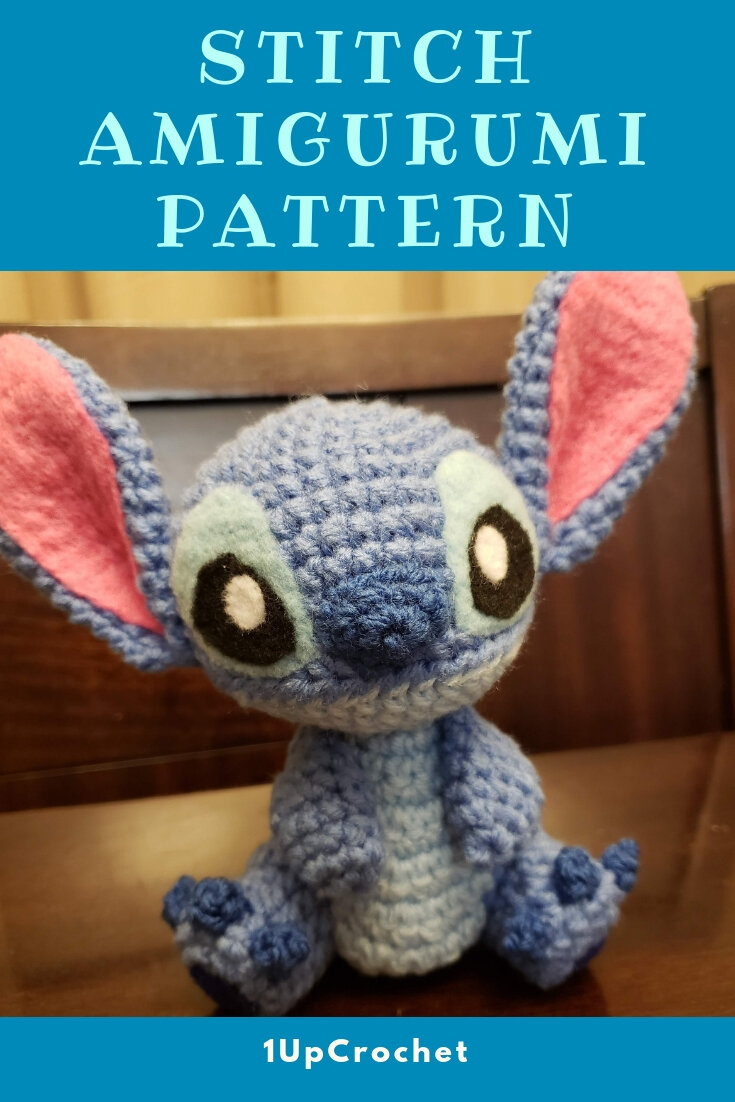
Stitch Amigurumi Pattern
A few notes before we begin
-While creating this amigurumi you will work in continuous rounds, unless told otherwise.
-When I am creating an amigurumi based on a certain character I like to look at reference pictures of the character I am creating. It really helps when assembling the pieces and making the facial features!
-Your finished amigurumi should measure about 6 inches tall, depending on yarn type and tension.
ª
I DID NOT CREATE THIS CHARACTER. The character stitch IS COPYRIGHT OF Disney. THIS PATTERN IS NOT AFFILIATED WITH, ENDORSED BY, OR SPONSORED BY Disney.
ª
YOU MAY NOT CLAIM THIS PATTERN AS YOUR OWN. YOU MAY NOT REPRINT OR SELL THIS PATTERN.
ª
IF YOU USE THIS PATTERN I ASK THAT YOU PLEASE GIVE ME CREDIT AS THE ORIGINAL DESIGNER AND LINK THE PATTERN BACK TO ME.
ª
FEEL FREE TO MAKE CHANGES OR ADAPT THIS PATTERN AS YOU SEE FIT. AFTER ALL, THIS IS YOUR CREATION! BUT PLEASE, AS STATED ABOVE, GIVE ME CREDIT FOR THE ORIGINAL DESIGN.
Materials Needed
o G Hook (4.0mm crochet hook)
o Red Heart Super Saver: Light Periwinkle
o Red Heart Super Saver: Light Blue
o Red Heart Super Saver: Blue Suede
o Blue Felt
o Light Blue Felt
o Black Felt
o White Felt
o Pink Felt
o Hot glue/ tacky glue. (Optional: instead of glue you can use a felting needle)
o Fiber Fil stuffing
o Scissors
o Yarn Needle for sewing
Abbreviations
SC = Single Crochet
INC = Increase (2 SC in one)
HDC= Half double crochet
DC = Double crochet
DEC = invisible decrease
Sl St = Slip Stitch
F/O = Finish off.
cc= Color Change
Head
The head is made in two parts, a top piece, and a bottom piece.
Head Top
Use Light Periwinkle
Round 1) 6 SC in Magic Ring (6)
Round 2) INC around (12)
Round 3) 1 SC, INC; repeat around (18)
Round 4) 2 SC, INC; repeat around (24)
Round 5) 3 SC, INC; repeat around (30)
Round 6) 4 SC, INC; repeat around (36)
Round 7) 5 SC, INC; repeat around (42)
Round 8) SC around (42)
Round 9) – Round 12) SC around (42)
Finish off. Leave open and stuff.
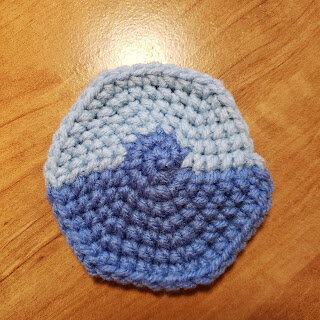
Head Bottom
You will need Light Periwinkle and Light Blue
Start with Light Periwinkle.
Round 1) 6 sc in magic ring (6)
Round 2) Inc around (12)
Round 3) [1 sc, inc] rep 6 times (18)
-cc to Light Blue-
Round 4) [2 sc, inc] rep 3 times, cc to Light Periwinkle, [2 sc, inc] rep 3 times (24)
-cc to Light Blue-
Round 5) [3 sc, inc] rep 3 times, cc to Light Periwinkle, [3 sc, inc] rep 3 times (30)
-cc to Light Blue-
Round 6) [4 sc, inc] rep 3 times, cc to Light Periwinkle, [4 sc, inc] rep 3 times (36)
-cc to Light Blue-
Round 7) [5 sc, inc] rep 3 times, cc to Light Periwinkle, [5 sc, inc] rep 3 times (42)
Finish with a slip stitch. Leave a long tail for sewing.
The bottom piece should look like this
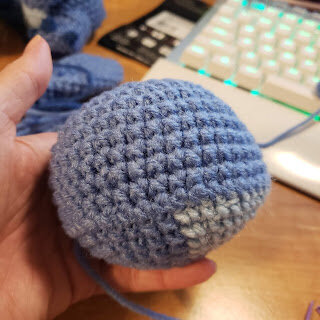
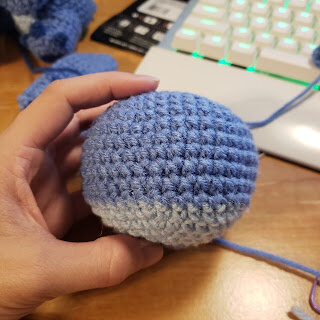
Assemble the head by sewing the top piece to the bottom piece. Make sure to stuff before you finish sewing together. The assembled head should look like this
Body
Use Light Periwinkle
Round 1) 6 SC in Magic Ring (6)
Round 2) INC around (12)
Round 3) 1 SC, INC; repeat around (18)
Round 4) 2 SC, INC; repeat around (24)
Round 5) 3 SC, INC; repeat around (30)
Round 6) 4 SC, INC; repeat around (36)
Round 7) SC around
Round 8) 4 SC, DEC; repeat around (30)
Round 9) SC around (30)
Round 10) 8 SC, DEC; repeat around (27)
Round 11) SC around (27)
Round 12) 7 SC, DEC; repeat around (24)
Round 13) SC around (24)
Round 14) 6 SC, DEC; repeat around (21)
Round 15) SC around (21)
Round 16) 5 SC, DEC; repeat around (18)
Finish off. Leave open and stuff.
Ears
Use Light Periwinkle. Make two.
Round 1) 6 SC in magic ring (6)
Round 2) 1 SC, INC; repeat around (9)
Round 3) 2 SC, INC; repeat around (12)
Round 4) 3 SC, INC; repeat around (15)
Round 5) 4 SC, INC; repeat around (18)
Round 6) SC around (18)
Round 7) – Round 16) SC around (18)
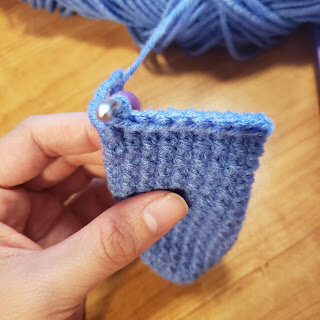
Fold flat, do not stuff.
SC across the opening to close.

Open end of the ear.
SC across the opening to close the ear
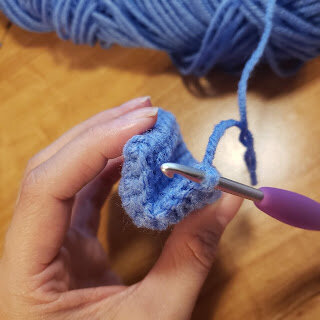
After Closing fold in half and SC across
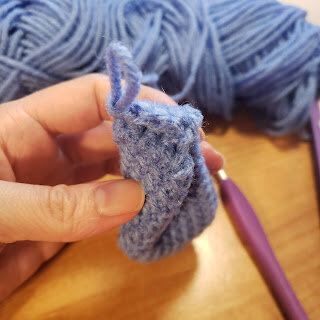
Finished ear
Arm
Use Light Periwinkle. Make two.
Round 1) 6 SC in magic ring (6)
Round 2) 1 SC, INC; repeat around (9)
Round 3) SC around (9)
Round 4) 2 SC, INC; repeat around (12)
Round 5) SC around (12)
Round 6) 2 SC, DEC; repeat around (9)
Lightly stuff the inside. Fold flat and SC across the opening to close. Turn and SC across again.
Foot
Use Light Periwinkle. Make two.
Round 1) 6 SC in magic ring (6)
Round 2) INC around (12)
Round 3) 1 SC, INC; repeat around (18)
Round 4) SC around in back loops (18)
Round 5) [DEC, 3 SC] repeat 3 times, DEC, 1 SC (14)
Round 6) SC around (14)
Round 7) 12 SC
Now we will turn our work and begin crocheting in rows.
Do not chain 1 before turning your work.
Row 8) 7 SC, turn
Row 9) 6 SC
Finish off. Leave the foot open and stuff.
Belly
Use Light Blue
To make this piece we will crochet in ROWS, not rounds. At the end of each row chain 1 before turning your work.
Chain 6
Row 1) SC across (5)
Row 2) SC across (5)
Row 3) 2 SC, INC, 2 SC (6)
Row 4) SC across (6)
Row 5) SC across (6)
Row 6) 3 SC, INC, 2 SC (7)
Row 7) SC across (7)
Row 8) 3 SC, INC, 3 SC (8)
Row 9) 4 SC, INC, 3 SC (9)
Row 10) SC across (9)
Finish off.
Nose
Use Suede Blue
Round 1) 6 SC in magic ring (6)
Round 2) 4 SC, INC, SC, INC (8)
Finish off. Leave open and stuff
Toes
Use Suede Blue.
Make six.
3 SC in magic ring. 1 sc to close the ring.
Finish off
Tail
Use Light Periwinkle
Round 1) 6 Sc in magic ring (6)
Round 2) 1 SC, INC; repeat around (9)
Round 3) SC around (9)
Round 4) 1 SC, DEC; repeat around (6)
Finish off and leave open.
Eyes
Using your scissors, take the light blue felt and cut our two almond shapes for the lighter area around Stitch's eyes.
Cut out two smaller round almond shapes from the black felt for the eyes.
Cut two smaller circles of white felt for the eye highlights.
*Use the photos of the finished Stitch amigurumi to see the shapes you will need. I recommend also looking at reference photos of Stitch as a guide for shaping and sizing the eyes correctly.
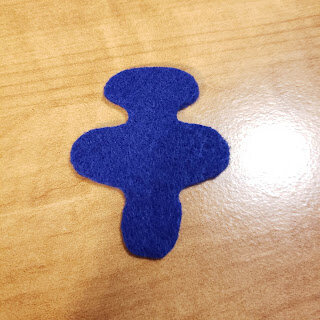
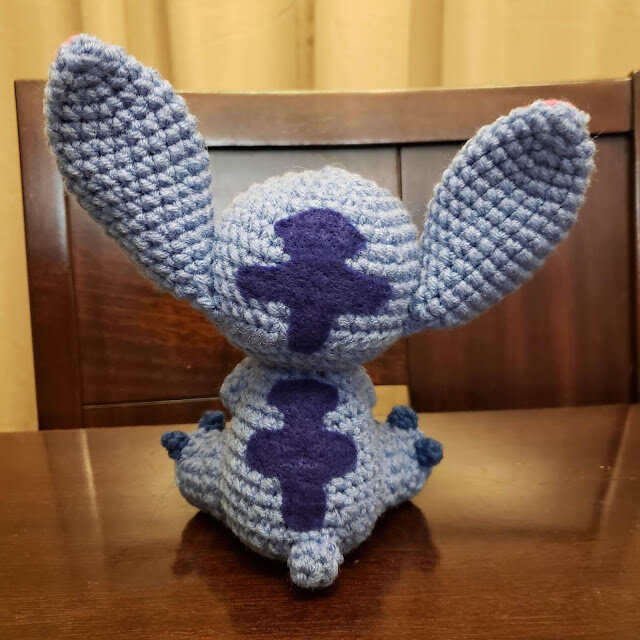
Back Spots
Cut out the shape as pictured below from the blue felt for Stitch's back. Make two of these. One will be slightly smaller. The smaller one will go on the back of Stitch's head.
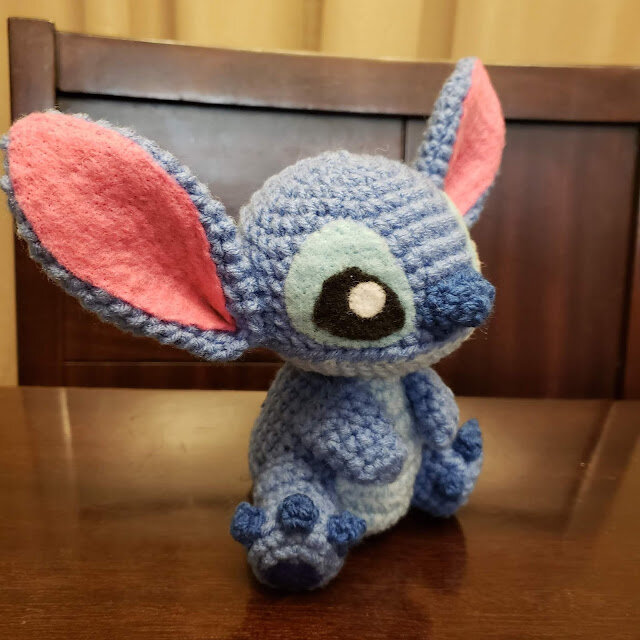
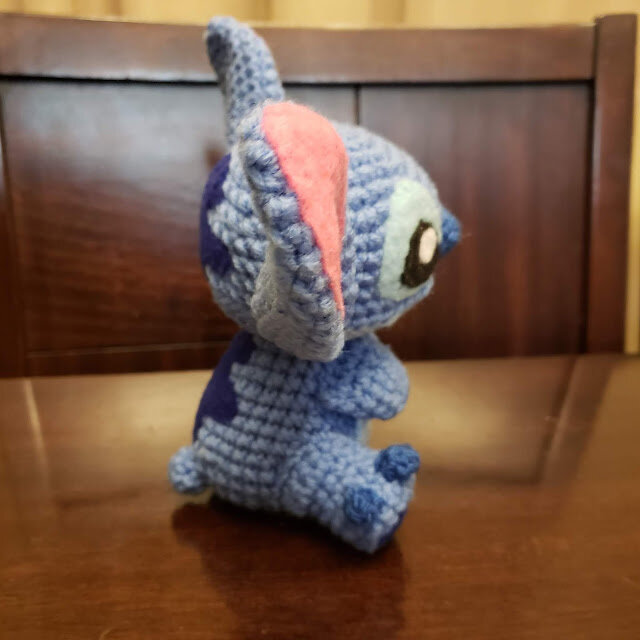
Assembly
Use the finished photos of Stitch and the end of this page as a visual guide to help with assembly. I recommend using pins to help with planning limb placement. This will help in deciding where is the best place to sew on the tail and feet so that Stitch can balance and sit upright.
1. Sew the head onto the open end of the body.
2. Sew the belly to the front of the body.
3. Sew the feet the sides of the body and the tail to the lower back side of the body.
4. Sew the arms to the body, just under the head.
5. Sew the nose to the face, just above the light blue.
6. Sew the toes to the feet.
7. Line the inner ears with pink felt. Use glue or a felting needle to apply the felt.
8. Sew the ears to the head.
9. Apply the eyes to the face and the spots to the back.
Finished!
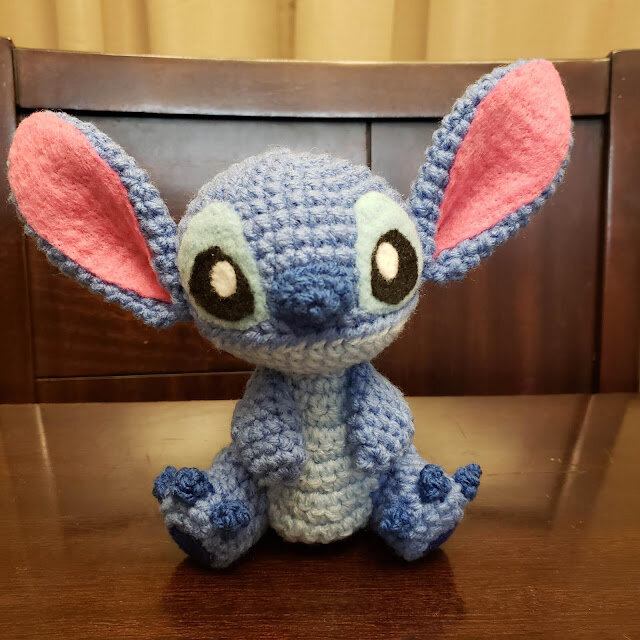
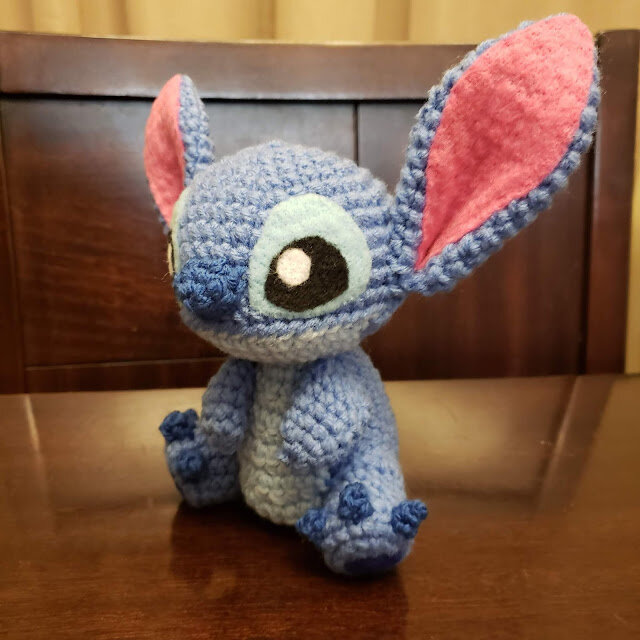

All finished!
Thank you so much for checking out my pattern! I had a great time making Stitch. He is one of my favorite Disney characters! If you notice any discrepancies in the pattern or have any questions about the pattern, let me know in the comments below.
I'd LOVE to see your work too!
Shout out to me on Twitter and Instagram @1UPcrochet and show me pictures of your completed projects!