

Free Chibi-Style Sylveon Inspired Amigurumi Pattern
By 1Up Crochet


-
-While making this amigurumi you will work in continuous rounds, unless told otherwise. Use a stitch marker to mark the end of your rounds.
-The finished amigurumi should measure approximately 9 inches tall. Size may vary, depending on yarn type and personal yarn tension.
-Instructions that need to be repeated will be marked with brackets followed by the number of times it needs to be repeated.
Example:
Round 4) [2 sc, inc] rep 6 times (24)
-
This pattern uses worsted weight (4-medium yarn)
All colors are from Red Heart Super Saver:
-Soft White
-Light Raspberry
-Periwinkle Blue
-Light Blue -
Blue
Light Blue
White
-
G Hook (4.0mm)
E Hook (3.5mm)
*Note: the E hook will only be used for making the Ribbons. All other body parts will be made with the G hook.
Scissors
Yarn Needle
Fiber-Fil Stuffing
Hot Glue -or- Felting Needle
*Note: I use a felting needle to apply felt to my amigurumi. This is an optional technique. If you do not have a felting needle you can use glue instead.
Important Information
You may not claim this pattern as your own. You may not alter, copy, sell, or redistribute this pattern in whole or in part.
This pattern is intended for personal use only.
If you use publish photos of items made from this pattern I ask that you please give me credit as the original designer of the pattern. It's always a good idea to give credit where credit is due.
I DID NOT CREATE THIS CHARACTER. SYLVEON IS COPYRIGHT THE POKEMON COMPANY. THIS PATTERN IS NOT AFFILIATED WITH, ENDORSED BY, OR SPONSORED BY THE POKEMON COMPANY. THIS PATTERN IS NOT BRANDED AS ANYTHING AFFILIATED WITH SAID FRANCHISE.
Head
Use Soft White.
Round 1) 6 sc in magic ring (6)
Round 2) Inc around (12)
Round 3) [1 sc, inc] rep 6 times (18)
Round 4) [2 sc, inc] rep 6 times (24)
Round 5) [3 sc, inc] rep 6 times (30)
Round 6) [4 sc, inc] rep 6 times (36)
Round 7) [5 sc, inc] rep 6 times (42)
Round 8) [6 sc, inc] rep 6 times (48)
Round 9) [7 sc, inc] rep 6 times (54)
Round 10) sc around (54)
Round 11) – Round 15) sc around (54)
Round 16) {in Front Loops only: 3 sc, 6 inc, 3 sc}, 42 sc (60)
Round 17) [9 sc, inc] rep 6 times (66)
Round 18) sc around (66)
Round 19) [1 sc, dec] rep 6 times, 48 sc (60)
Round 20) [3 sc, dec] rep 12 times (48)
Round 21) [6 sc, dec] rep 6 times (42)
Round 22) [5 sc, dec] rep 6 times (36)
Round 23) [4 sc, dec] rep 6 times (30)
Round 24) [3 sc, dec] rep 6 times (24)
Finish with a slip stitch. Leave a long tail for sewing. Stuff the head. When stuffing pay attention to the nose and ensure the nose is adequately stuffed to prevent wrinkling.
Body
Use Soft White.
Round 1) 6 sc in magic ring (6)
Round 2) Inc around (12)
Round 3) [1 sc, inc] rep 6 times (18)
Round 4) [2 sc, inc] rep 6 times (24)
Round 5) [3 sc, inc] rep 6 times (30)
Round 6) [4 sc, inc] rep 6 times (36)
Round 7) sc around (36)
Round 8) sc around (36)
Round 9) sc around (36)
Round 10) [4 sc, dec] rep 6 times (30)
Round 11) sc around (30)
Round 12) sc around (30)
Round 13) sc around (30)
Round 14) [3 sc, dec] rep 6 times (24)
Round 15) sc around (24)
Round 16) sc around (24)
Round 17) [2 sc, dec] rep 6 times (18)
Round 18) sc around (18)
Finish with a slip stitch. Stuff the body. Leave a long tail for sewing.
Front Leg
Use Soft White and Light Raspberry. Make two.
Start with Light Raspberry.
Round 1) 6 sc in magic ring (6)
Round 2) [1 sc, inc] rep 3 times (9)
Round 3) sc around (9)
Round 4) sc around (9)
Round 5) 8 sc, inc (10)
-color change to Soft White-
Round 6) sc around (10)
Round 7) 9 sc, inc (11)
Round 8) sc around (11)
Round 9) 10 sc, inc (12)
Round 10) sc around (12)
Round 11) – Round 15) sc around (12)
Finish off the first leg with a slip stitch and stuff. Do not finish off the second leg. We are going to join the two legs together with a sc and then continue to crochet in the round around both legs.
How to join the legs:

Round 16) sc around both legs (24)
Do not finish off yet. Leave your stitch marker in place. Now that the legs are one piece we are going to join them to the body.

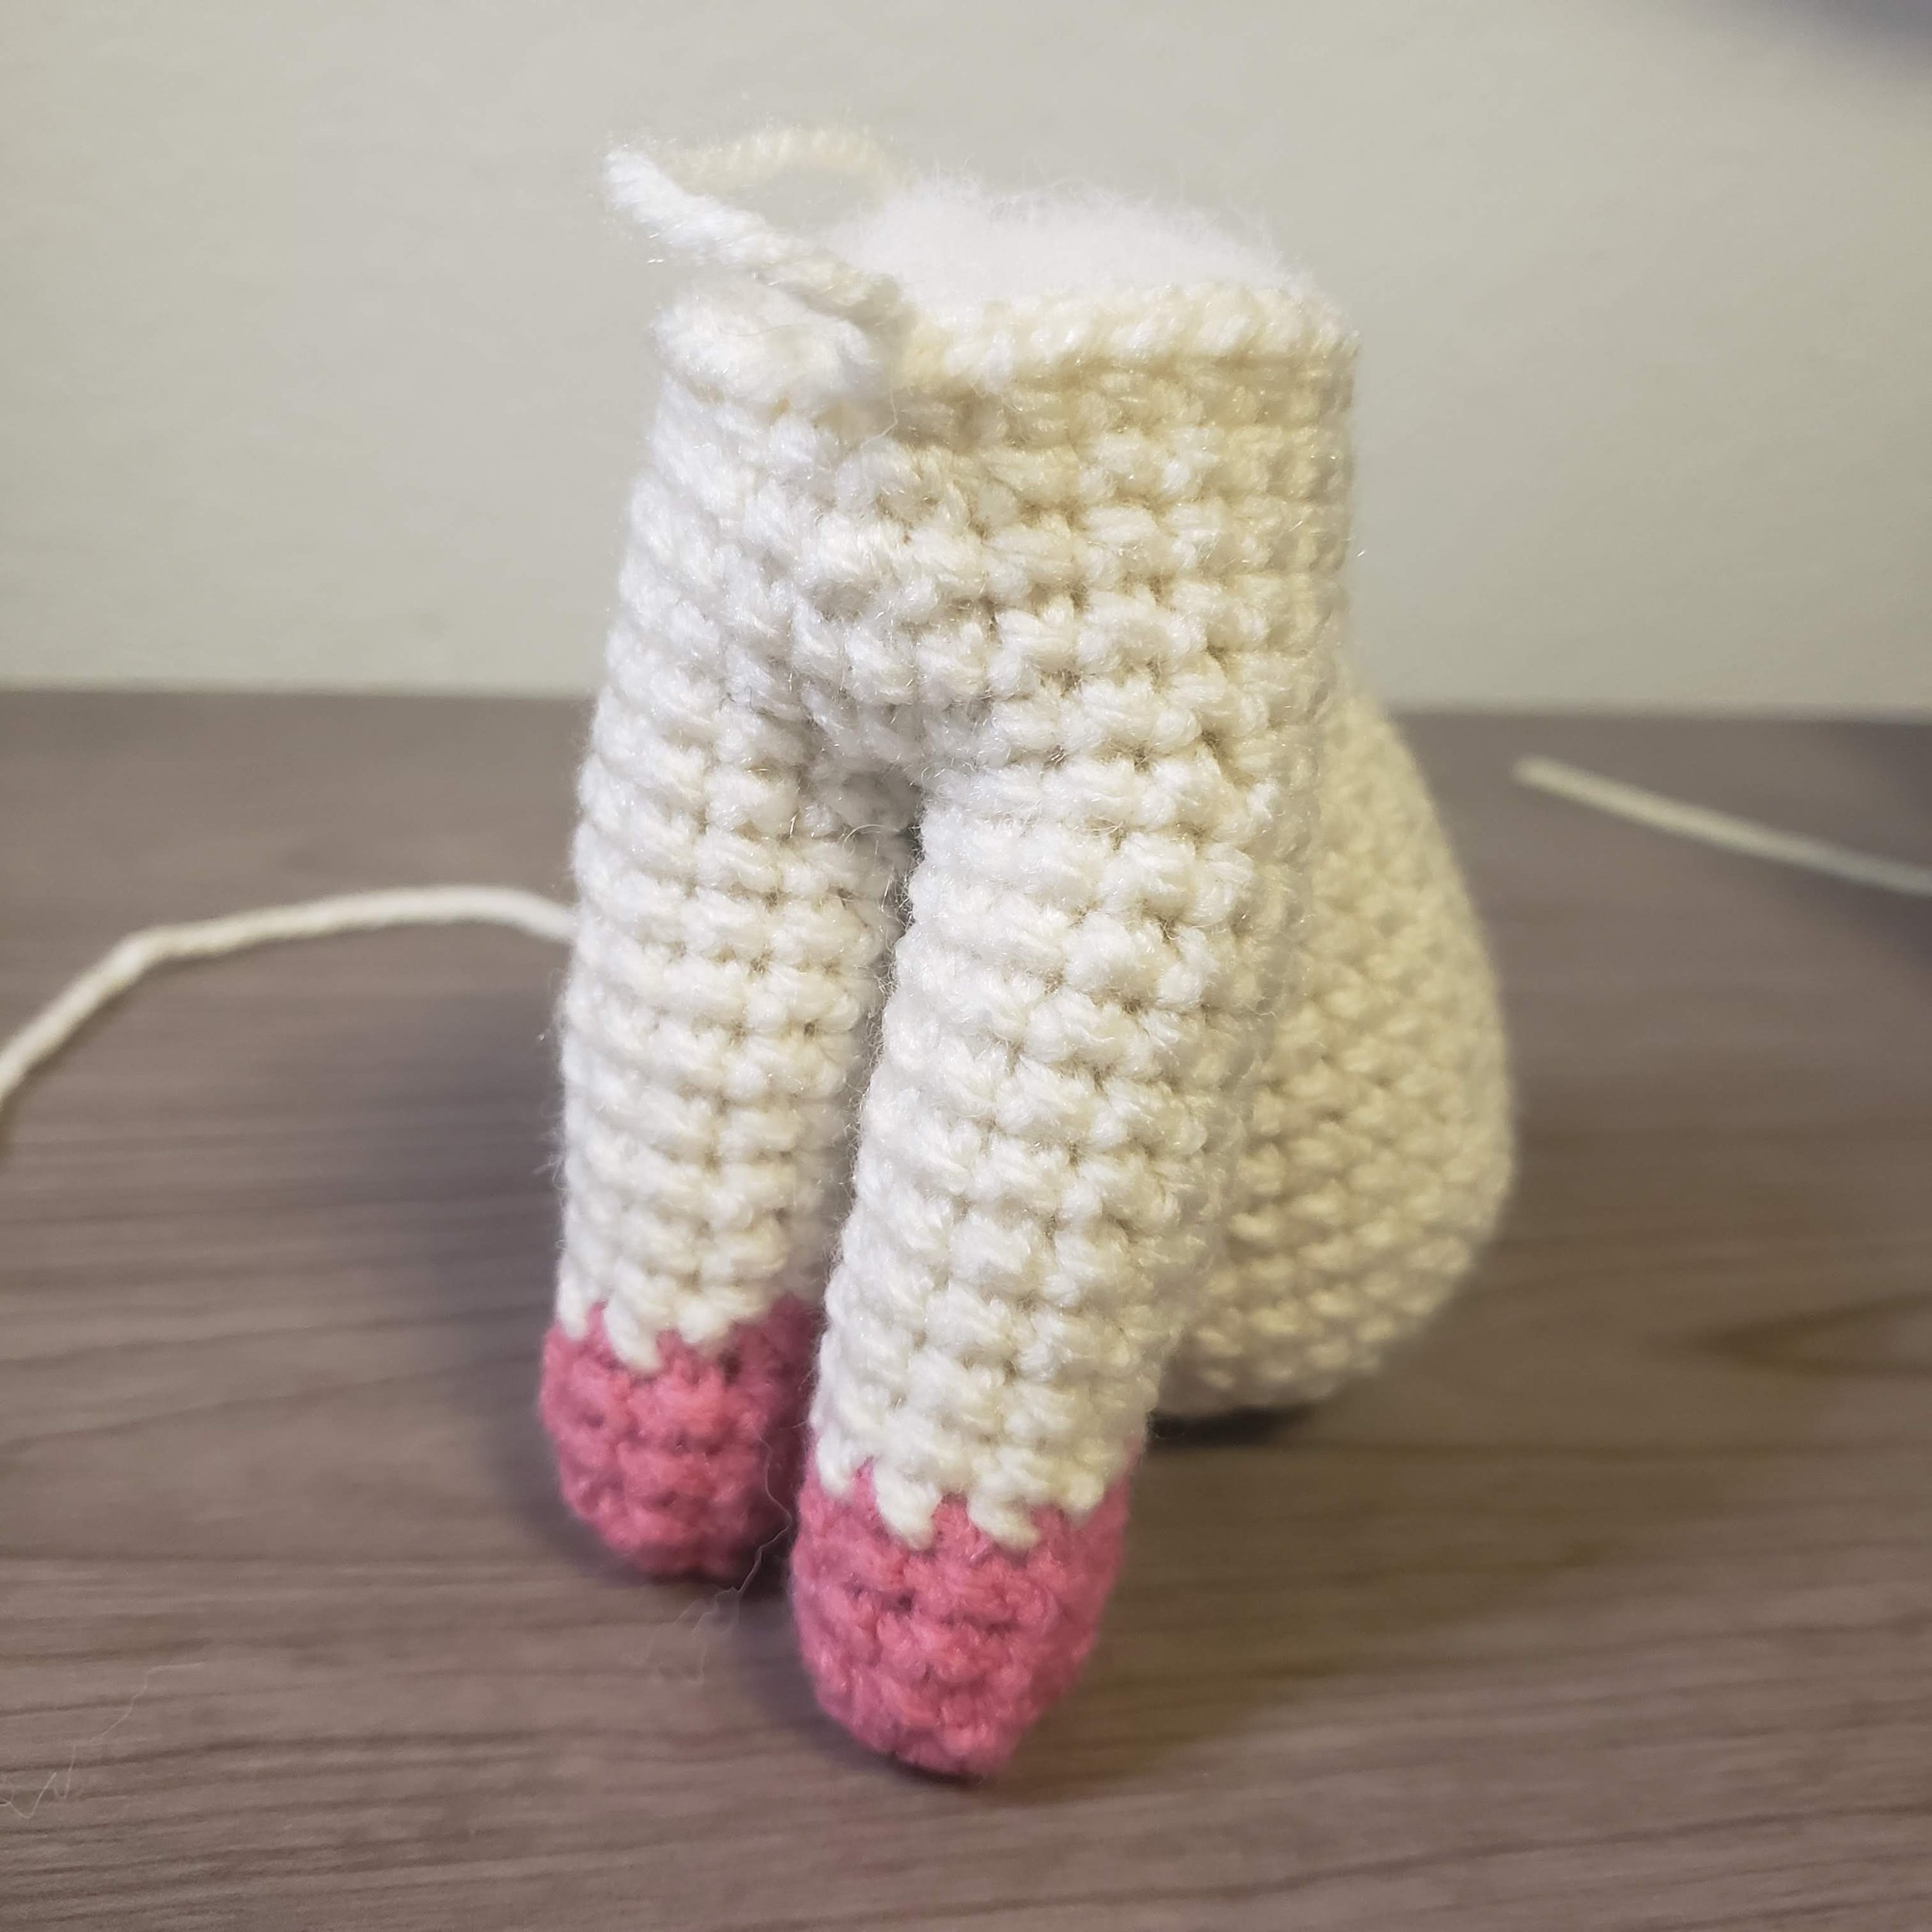
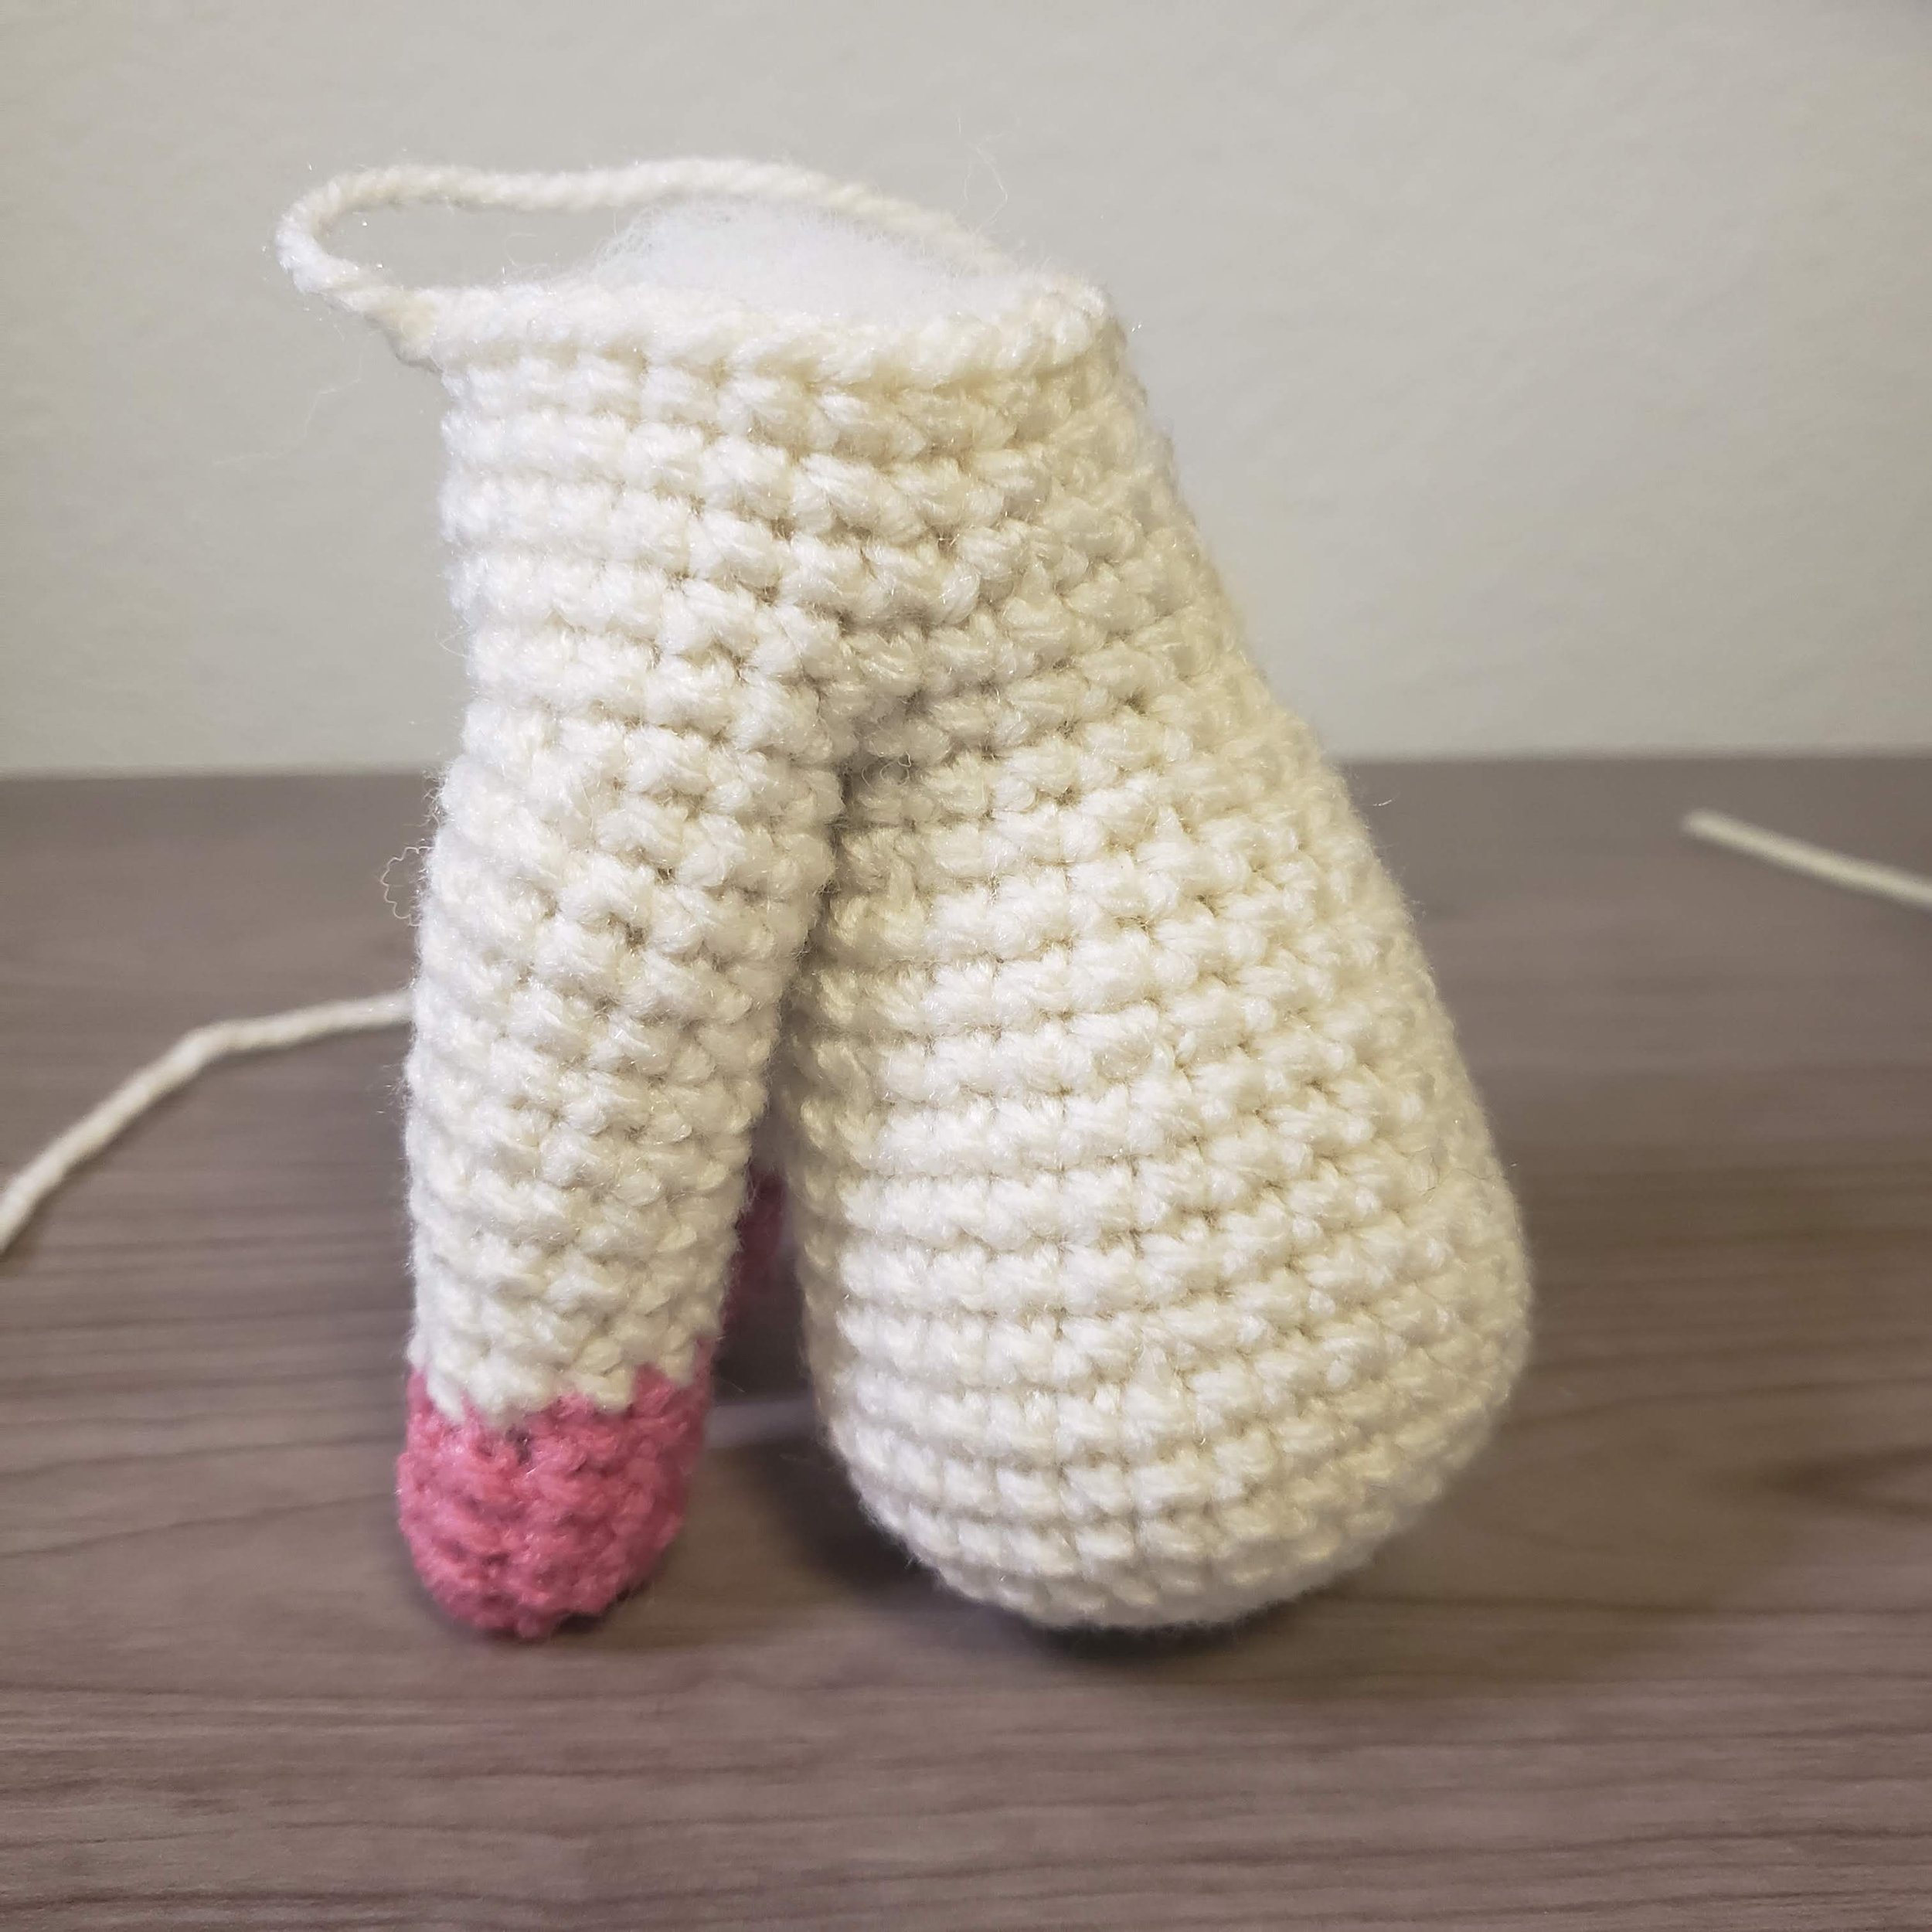
What the Legs should look like after Round 16.
Join the Legs with the Body
Now we are going to crochet the legs to the body to make them into one piece.
First, we align the legs to the front of the body as seen below.

Next, take a long piece of Soft White yarn and thread it through your yarn needle. Use your yarn needle sew the legs and body together. Sew through exactly 6 stitches on the body and 6 stitches through the legs.

Tie off and weave in the loose ends of the yarn you just used to sew the body and legs together.
This should leave you with 12 unused stitches on the body piece and 18 unused stitches on the front legs piece.
Now we will continue to crochet in the round around the body and legs.
Round 17) sc around legs and body (30)
Round 18) sc around (30)
Round 19) [8 sc, dec] rep 3 times (27)
Round 20) [7 sc, dec] rep 3 times (24)
Round 21) sc around (24)
Finish with a slip stitch. Finish stuffing the united legs and body. Leave a long tail for sewing.
*Note: If you notice some gaping in between the front legs or on the sides of the body where we joined the separate pieces together, just take some yarn of the same color and place a small stitch there to sew it closed.
*Another note: When counting rows to check which row you are on, count from the bottom of the front legs up, not on the body.
What the joined body and legs should look like 45 degree view
What the joined body and legs should look like side view
Thigh
Use Soft White. Make two.
Round 1) 6 sc in magic ring (6)
Round 2) inc around (12)
Round 3) [1 sc, inc] rep 6 times (18)
Round 4) [2 sc, inc] rep 6 times (24)
Round 5) [3 sc, inc] rep 6 times (30)
Round 6) 7 dec, 16 sc (23)
Finish with a slip stitch. Leave a long tail for sewing. Stuff the thigh.
Back Foot
Use Light Raspberry. Make two.
Round 1) 6 sc in magic ring (6)
Round 2) [1 sc, inc] rep 3 times (9)
Round 3) sc around (9)
Round 4) sc around (9)
Finish with a slip stitch. Leave a long tail for sewing. Stuff the foot.
Head Cap
Use Light Raspberry.
Round 1) 6 sc in magic ring (6)
Round 2) inc around (12)
Round 3) [1 sc, inc] rep 6 times (18)
Round 4) [2 sc, inc] rep 6 times (24)
Round 5) [3 sc, inc] rep 6 times (30)
Round 6) [4 sc, inc] rep 6 times (36)
Round 7) [5 sc, inc] rep 6 times (42)
Round 8) [6 sc, inc] rep 6 times (48)
Round 9) [7 sc, inc] rep 6 times (54)
Now we will begin working in ROWS.
Turn your work, do not chain 1 before starting row 10. For Rows 11 through 15 you will chain 1 at the end of each row.
Round 10) sl st, 8 sc (9)
Round 11) dec, 5 sc, dec (7)
Round 12) dec, 3 sc, dec (5)
Round 13) dec, 1 sc, dec (3)
Round 14) dec, 1 sc (2)
Round 15) dec (1)
Finish off. Leave a long tail for sewing.
Ear
Use Light Raspberry
Round 1) 6 sc in magic ring (6)
Round 2) [1 sc, inc] rep 3 times (9)
Round 3) sc around (9)
Round 4) [2 sc, inc] rep 3 times (12)
Round 5) [3 sc, inc] rep 3 times (15)
Round 6) [4 sc, inc] rep 3 times (18)
Round 7) sc around (18)
Round 8) – Round 13) sc around (18)
Round 14) [4 sc, dec] rep 3 times (15)
Round 15) sc around (15)
Round 16) [3 sc, dec] rep 3 times (12)
Finish with a slip stitch. Leave a long tail for sewing. Do not stuff. Fold the ear flat.
Ear Lobe
Use Light Raspberry.
Round 1) 4 sc in magic ring (4)
Round 2) [1 sc, inc] rep 2 times (6)
Finish with a slip stitch. Leave a long tail for sewing. This piece is small enough that you shouldn’t need to stuff it.
Right Ear Fur
Use Light Raspberry.
This piece is crocheted in ROWS, not in the round.
Chain 4.
Row 1) sl st, chain 4, working down the chain{sc, hdc, hdc} then sl st into 1st stitch from the base of chain. Chain 3, working down the chain {sc, hdc,} then sl st into 1st stitch from the base of the chain. See the Photo Guide for Row 1 below for guidance.


Tail
Use Light Raspberry. The tail is made from two separate pieces that we will crochet together to form a single piece.
Tail Part A
Round 1) 3 sc in magic ring (3)
Round 2) inc around (6)
Round 3) [1 sc, inc] rep 3 times (9)
Round 4) [2 sc, inc] rep 3 times (12)
Round 5) sc around (12)
Round 6) -Round 10) sc around (12)
Finish off with a slip stitch.
Tail Part B
Round 1) 3 sc in magic ring (3)
Round 2) sc around (6)
Round 3) -Round 4) sc around (6)
Do not finish off. With Part B still on your hook, join Part B and Part A together in the same way you joined the front legs together.
We are going to pick up the row count from Part A. The next round will be Round 11.
Round 11) sc around both pieces (18)
Round 12) [4 sc, dec] rep 3 times (15)
Round 13) [3 sc, dec] rep 3 times (12)
Round 14) sc around (12)
Round 15) [2 sc, dec] rep 3 times (9)
Round 16) sc around (9)
Round 17) [1 sc, dec] rep 3 times (6)
Round 18) 3 sc, then turn your work. chain 1, then 2 sc.
Finish off and stuff the tail.

Bow Half
Use White and Light Raspberry. Make four.
To start this piece we are going to make a chain and then crochet around the chain to form a round.
Chain 7.
Round 1) down the chain: 5 sc, inc, up the other side of the chain: 5 sc, inc (14)
see photo reference below for guidance


Round 2) sc around (14)
- color change to Light Raspberry -
Round 3) [5 sc, dec] rep 2 times (12)
Round 4) [4 sc, dec] rep 2 times (10)
Round 5) [3 sc, dec] rep 2 times (8)
Finish with a slip stitch. Leave a long tail for sewing. Do not stuff. Fold the piece in half. Sew open end to another bow-half to for the completed bow. Make two bows.

Short Ribbon
You will use a 3.5mm hook (E hook) or smaller to make the ribbons. Use Soft White, Light Raspberry, Periwinkle Blue, and Light Blue.
This piece is crocheted in ROWS, not in the round.
Make three.
*Tip: When crocheting in rows we typically will chain 1 at the end of each row before turning our work to accommodate for the height of the stitches in the next row. We typically start crocheting into the 2nd stitch from our hook. This gives us bumpy-looking edges.
So for this piece I recommend not chaining at the end of the row. Turn your work without chaining, and then crochet into the very first stitch from your hook. This will give a more solid, straight-looking edge.
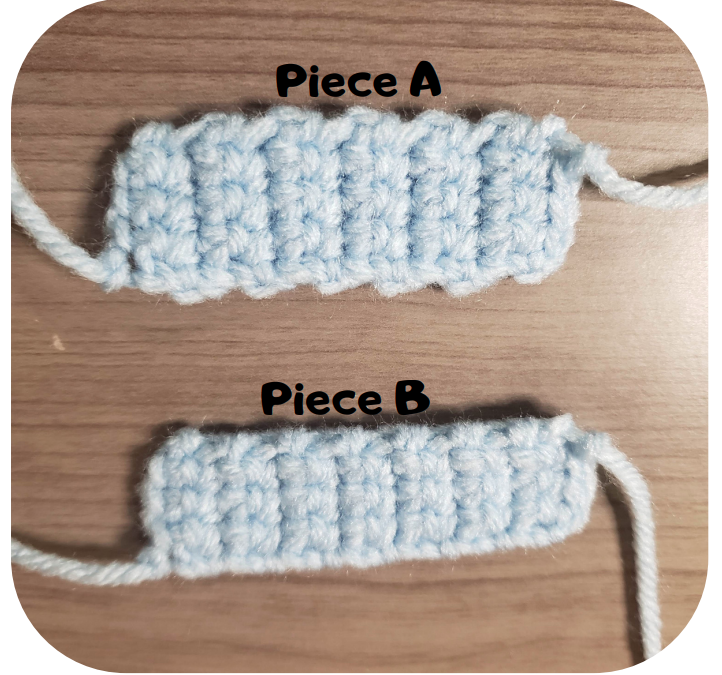
Notice the difference between Piece A and Piece B.
Piece A was crocheted by chaining 1 at the end of each row while Piece B has no chaining at the end of the rows.
Start with Soft White
Chain 5
Row 1) sc across (4)
Row 2) -Row 24) sc across (4)
-color change to Light Raspberry-
Row 25) sc across (4)
Row 26) sc across (4)
-color change to Periwinkle Blue-
Row 27) sc across (4)
Row 28) sc across (4)
-color change to Light Blue-
Row 29) sc across (4)
Row 30) – Row 34) sc across (4)
Row 35) chain 5, working down the chain{sl st, sc, sc, hdc} then sl st into 2nd stitch from base of chain. repeat.
See photo guide below for Row 35

Finish off and weave in the loose tail.
Long Ribbon
You will use a 3.5mm hook (E hook) or smaller.
Use White, Light Raspberry, Periwinkle Blue, and Light Blue.
This piece is crocheted in ROWS, not in the round. Start with Soft White.
Chain 5
Row 1) sc across (4)
Row 2) -Row 54) sc across (4)
-color change to Light Raspberry-
Row 55) sc across (4)
Row 56) sc across (4)
-color change to Periwinkle Blue-
Row 57) sc across (4)
Row 58) sc across (4)
-color change to Light Blue-
Row 59) sc across (4)
Row 60) – Row 64) sc across (4)
Row 65 ) chain 5, working down the chain{sl st, sc, sc, hdc} then sl st into 2nd stitch from base of chain. repeat.
(Refer to photo guide for the previous ribbon at Row 35)
Eyes and Nose
Cut out the eye shapes from the light blue felt and two oval shapes from the white felt.
For the nose cut out a tiny triangle from the black felt.

Inner Ears
Cut out two long oval shapes from the blue felt.
Assembly
Use the provided pictures of the finished Sylveon as a visual aid to help guide you in the assembly process.


Finished Chibi Sylveon Images


Thanks for checking out my pattern!
I’d LOVE to see your work too! Shout out to me on social media with #1upcrochet and show off pictures of your completed projects!