
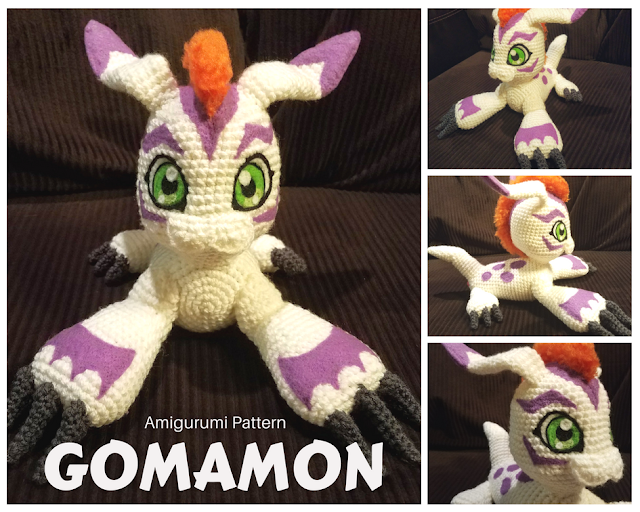
Digimon Gomamon Amigurumi Pattern
Digimon! Digital Monsters! Digimon are the Champions!
MATERIALS NEEDED
· G Hook (4.0mm crochet hook)
· White Yarn - I used Red Heart Super Saver in White
·Orange Yarn - I used Red Heart Super Saver in Carrot
· Black or Dark Grey Yarn - I used Red Heart Super Saver in Charcoal
· Black felt
· Purple felt
· Lime green felt
· White felt
· Hot glue or felting needle
· 18 gauge stem wire
· Fiber Fil stuffing
· Scissors
· Yarn Needle for sewing
Abbreviations
SC = Single Crochet
INC = Increase (2 SC in one)
HDC= Half Double Crochet
DC= Double Crochet
Sl St= Slip Stitch
DEC = invisible decrease
A few notes before we begin:
-While creating this amigurumi you will work in continuous rounds, unless told otherwise.
-When I am creating an amigurumi based on a certain character I like to look at reference pictures of the character I am creating. It really helps when assembling the pieces and making the facial features!
*You may not claim this pattern as your own. You may not reprint or sell this pattern.
*
If you use this pattern I ask that you please give me credit as the original designer and link the pattern back to me.
*Feel free to make changes or adapt this pattern as you see fit. After all, this is YOUR creation! But please, as stated above, give me credit for the original design.
Head
1. SC in Magic Ring (6)
2. INC around (12)
3. 1 SC, INC; repeat around (18)
4. 2 SC, INC; repeat around (24)
5. 3 SC, INC; repeat around (30)
6. 4 SC, INC; repeat around (36)
7. 5 SC, INC; repeat around (42)
8. 6 SC, INC; repeat around (48)
9. SC around (48)
10. -16. SC around (48)
17. (4 SC, INC); repeat 6 times, SC 18 (54)
18. (5 SC, INC); repeat 6 times, SC 18 (60)
19. SC around (60)
20. 8 SC, DEC; repeat around (54)
21. 7 SC, DEC; repeat around (48)
22. 6 SC, DEC; repeat around (42)
23. 5 SC, DEC; repeat around (36)
24. 4 SC, DEC; repeat around (30)
25. 3 SC, DEC; repeat around (24)
26. SC around (24)
27. 3 SC, INC; repeat around (30)
Finish off. Leave open. Stuff.
Keep in mind, the side of the head with the increases on rows 17 and 18 is the front side.
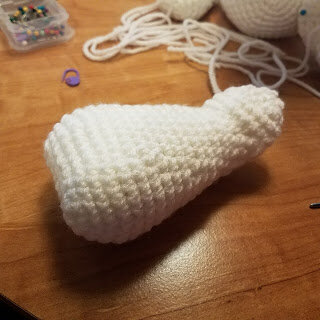
Body
Start stuffing about halfway through. Keep stuffing until you close off.
1. SC in Magic Ring (6)
2. INC around (12)
3. 1 SC, INC; repeat around (18)
4. 2 SC, INC; repeat around (24)
5. 3 SC, INC; repeat around (30)
6. 4 SC, INC; repeat around (36)
7. 5 SC, INC; repeat around (42)
8. 6 SC, INC; repeat around (48)
9. SC around (48)
10. -11. SC around (48)
12. 6 SC, DEC; repeat around (42)
13. -16. SC around (42)
17. 5 SC, DEC; repeat around (36)
18. -22. SC around (36)
23. 4 SC, DEC; repeat around (30)
24. -29. SC around (30)
30. 3 SC, DEC; repeat around (24)
31. 2 SC, DEC; repeat around (18)
32. 1 SC, DEC; repeat around (12)
33. DEC around (6)
Close off.
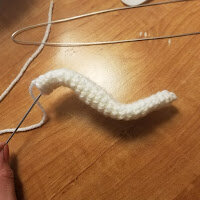
Tail
1. 3 SC in Magic Ring (3)
2. INC around (6)
3. SC around (6)
4. 1 SC, INC; repeat around (9)
5. SC around (9)
6. 2 SC, INC; repeat around (12)
7. -9. SC around (12)
10. SC 3, INC; repeat around (15)
11. 6 Sl St, 9 HDC (15)
12. 6 Sl St, 9 HDC (15)
13. -19 SC around (15)
20. 4 SC, INC; repeat around (18)
Finish off. Leave open and stuff the tail.
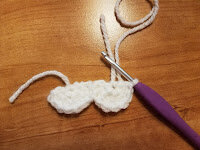
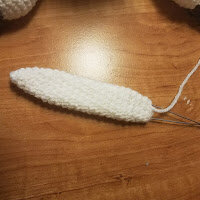
Face
Make 2 small semi-circles. This will be a flat piece that is worked in rows, NOT in the round.
1. 4 SC in magic ring, chain 1 and turn (4)
2. 2 HDC in each stitch across (8)
Finish off one of the semi-circles. Leave one with a long tail.
Using a spare piece of white yarn and your yarn needle, sew the two semi-circles together at the side through 3 stitches. See the picture for reference.

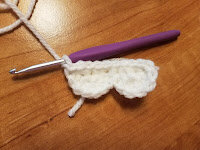
Use the tail from the semi-circle that wasn’t finished off to crochet a row of SC’s straight across the top of both semi-circles.
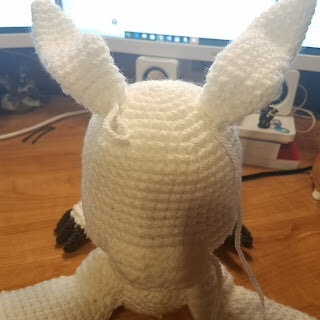
Ears
1. 3 SC in magic ring (3)
2. INC around (6)
3. SC around (6)
4. 1 SC, INC; repeat around (9)
5. SC around (9)
6. 2 SC, INC; repeat around (12)
7. -19. SC around (12)
20. 2 SC, DEC; repeat around (9)
21. SC around (9)
22. SC around (9)
Finish off.
Fold ears flat. Take stem wire and bend in the middle. Run the wire up through the ears to help the ears keep shape.
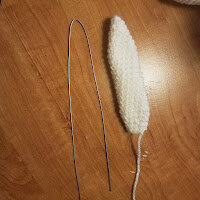
You are going to bend the ears in two places to give them a “Z” shape.
Felt purple “V” shapes to the tips of the ears.
Front Arms
Use white yarn. Make two.
With this piece we will start with a chain, then continue to crochet in the round around the chain.
1. Chain 11
2. Starting in 2nd chain from hook, 10SC, turn so that you will be crocheting down the other side of the chain, 10 SC (20)
3. INC, 4 SC; repeat around (24)
4. 3 SC, INC; repeat around (30)
5. 4 SC, INC; repeat around (36)
6. SC around (36)
7. SC around (36)
8. 10 SC, DEC; repeat around (33)
9. 9 SC, DEC; repeat around (30)
10. 8 SC, DEC; repeat around (27)
11. SC around (27)
12. SC around (27)
13. 7 SC, DEC; repeat around (24)
14. SC around (24)
15. SC around (24)
16. 6 SC, DEC; repeat around (21)
17. 5 SC, DEC; repeat around (18)
Make sure the arm is firmly stuffed up to this point. The rest of the arm should be only lightly stuffed.
18. 4 SC, 10HDC, 4 SC (18)
19. 4 SC, 10 HDC, 4 SC (18)
20. 4 Sl St, 10 DC, 4 Sl St (18)
21. SC around (18)
22. SC around (18)
23. 1 SC, DEC; repeat around (12)
24. DEC around (6)
Close off.
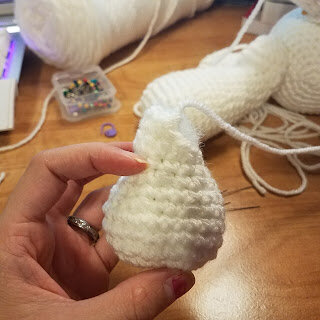
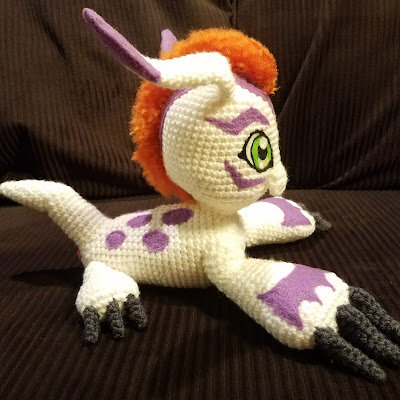
Refer to the images below to get an idea of how the arm should be shaped. The front arm is sort of an odd shape.
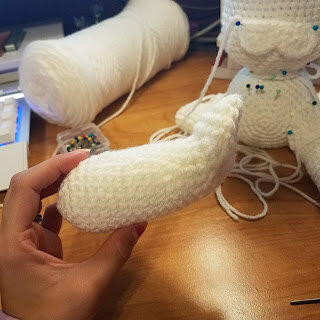
This is how the arm should attach to the front of the body.
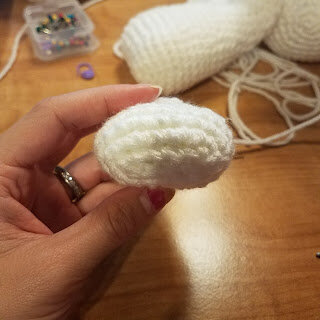
Back Foot
Use white yarn. Make two.
With this piece, we will start with a chain, then continue to crochet in the round around the chain.
1. Chain 7
2. 6 SC, turn so that you will be crocheting down the other side of the chain, 6 SC (12)
3. 1 SC, INC; repeat around (18)
4. 2 SC, INC; repeat around (24)
5. SC around (24)
6. SC around (24)
7. 2 SC, DEC; repeat around (18)
8. SC around (18)
9. 1 SC, SEC; repeat around (12)
10. SC around (12)
11. SC around (12)
12. 4 SC, 8 HDC (12)
Chain one, turn your work to work in rows.
13. HDC, 6 SC, Sl St
Finish off. Leave open. Stuff.
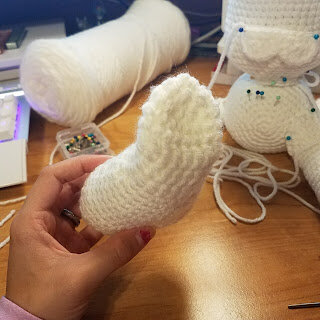
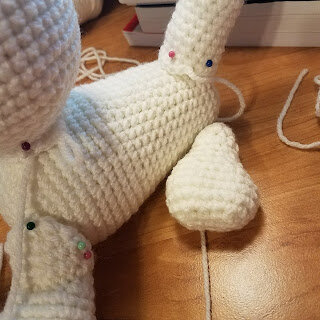
See the pictures below to get an idea of what the back foot should look like. It’s also an odd shape.
Front Claws
Use black yarn or dark grey yarn. Make six.
1. 3 SC in magic ring (3)
2. 2 SC, INC; repeat around (4)
3. 3 SC, INC; repeat around (5)
4. 4 SC, INC; repeat around (6)
5. 5 SC, INC; repeat around (7)
6. 6 SC, INC; repeat around (8)
7. 7 SC, INC; repeat around (9)
8. 8 SC, INC; repeat around (10)
9. 9 SC, 2 DC in the next st, 1 SC, Sl St (11)
Finish off. Leave open. Do not stuff! Fold the claw flat. The side with the DC’s is the topside of the claw.
Back Claws
Use black or dark grey yarn. Make six.
1. 3 SC in magic ring (3)
2. 2 SC, INC; repeat around (4)
3. 3 SC, INC; repeat around (5)
4. 4 SC, INC; repeat around (6)
Finish off. Leave open. Do not stuff! Fold the claw flat.
Assembly
One of the most helpful things for me when assembling and making the face for Gomamon was to look at reference pictures.
This was one of the most helpful images for me since it shows Gomamon at many different angles. I’ve provided it here for you to use as needed while assembling this project!

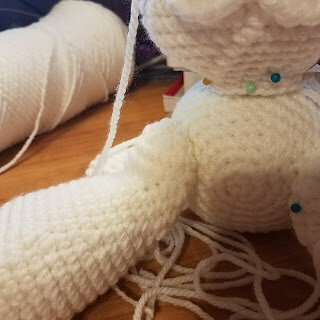
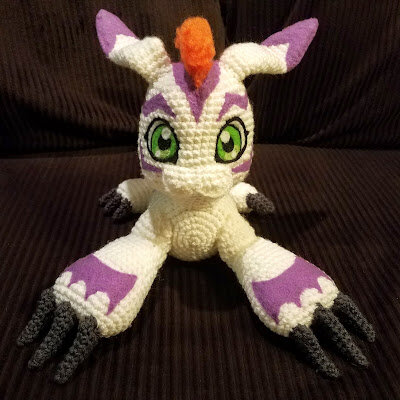
Sew the head onto the body. It should be sewn on the wider end of the body piece.
Sew the tail onto the body. It should be sewn on the smaller end of the body piece.
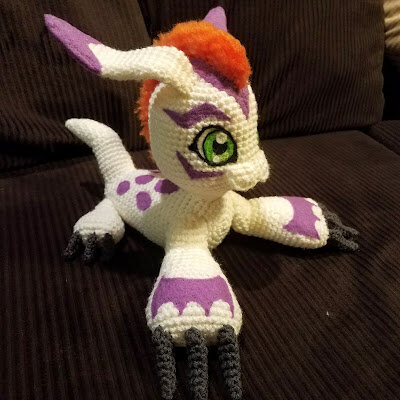
Sew on the front legs. They shouldn’t be sewn directly on the front facing forward, nor should they be sewn directly on the side. They should be somewhere in between that, about a 45 degree angle from each other. See the image below for reference.

Sew on the back legs to the back side of the body.
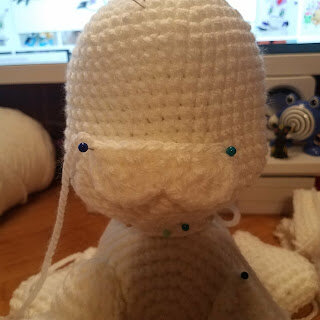
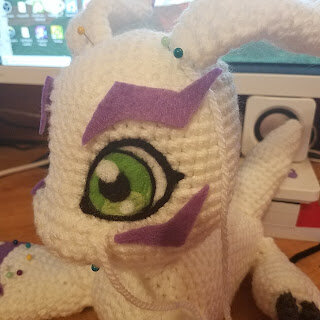
Sew the face piece onto the front of the face. The top of the face piece should approximately be lined up with rows 17 or 18.
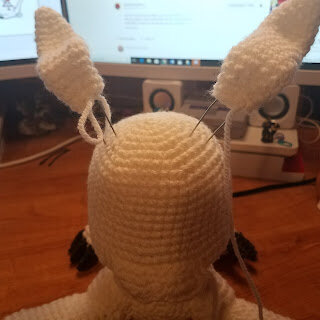
Place the ears on top of the head and stick the wires into the head. Sew the ears into place.
Sew the claws onto the front of the feet. The larger claws go on to the front arms and the smaller claws go onto the back feet. Each foot should have 3 claws.
Felting the details
This is probably the most challenging part of making Gomamon. You can cut out shapes using sheets of craft felt or you can use felting wool with a felting needle. I used a combination of both when making the details for Gomamon. Whichever method you use, take your time and be sure to take a look at reference images to get the proportions of the shapes correct!
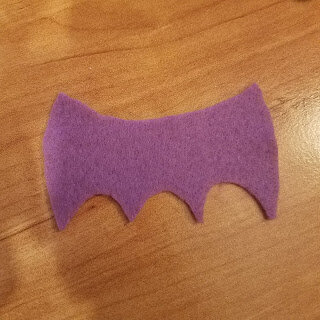
This is the purple shape cut from craft felt that goes on Gomamon's front foot. It sort of looks like a bat.
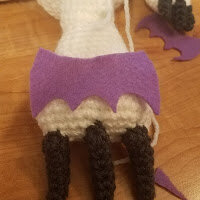
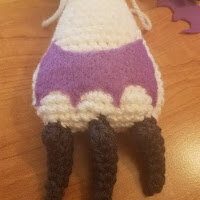
Before and after felting the purple shape onto the front paw. You can use glue if you do not have a felting needle!
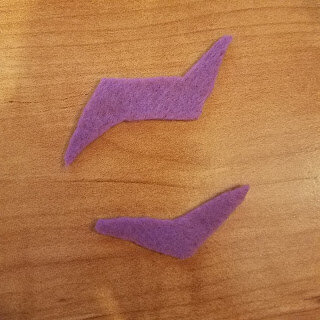
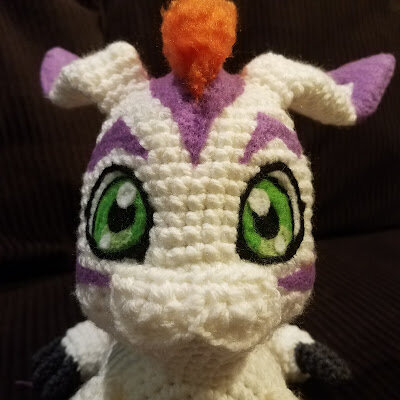
The top piece is the eyebrow. It's sort of a "z" shape. The bottom piece is what goes under the eye. It's a wide "v" shape.
Eyes
For the eyes, I cut out two round shapes from white craft felt and felted them onto the face. I outlined the eyes in black wool felt.
For the iris I used lime green felt and black felt for the pupil.
Once you have all of your eye colors felted or glued on, be sure to add a white highlight in the eye!
Spots
Gomamon's spots are pretty easy and straightforward. He has eight spots on his back. Cut out eight small round shapes from purple craft felt and glue them, or felt them, onto his back. See the pic below for reference.
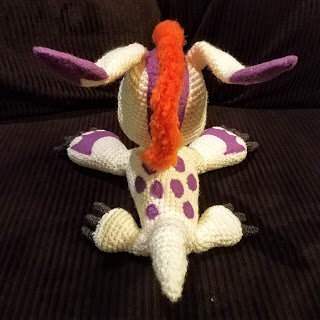
The Mohawk
My favorite part of Gomamon!
To make the mohawk you are going to need to cut LOTS of pieces of orange yarn. They should be about 3 inches in length. Just make a bunch! It’s okay if you run out, you can always make more.
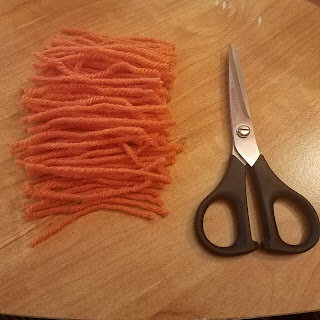
We are going to root each hair directly onto Gomamon’s head. Place your hook through a stitch. Hook the orange yarn and pull it through about halfway. Then hook over the yarn and pull through the loop. Pull the yarn tight so it is tightly rooted to the head.
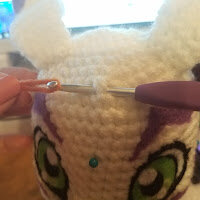
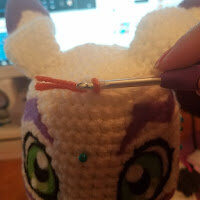
Continue rooting yarn to the head to make a mohawk.
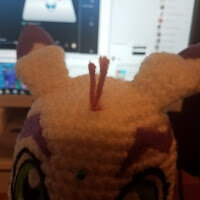
Once you have all your hairs in place, take your slicker brush and brush out the hair to make it fluffy. Once all of the hair is brushed out you may need to take your scissors and give your Gomamon sort of a “haircut” to even out and shape up his mohawk.
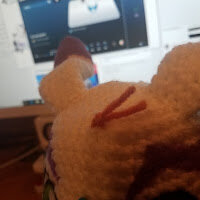
The last thing you need to do is felt the purple stripe in the center of the head. You will have to felt around and alongside the mohawk.
Your Gomamon should now be complete! Congrats!
Thank you so much!
Wow! This pattern turned out way bigger than I expected it would. Thanks for checking out my pattern! I had a great time making Gomamon and I hope you did too! If you have any questions or notice any inconsistencies in the pattern, let me know in the comments below and I'll do my best to get back to you.
I'd love to see your work too!
Shout out to me on twitter at
and show me pictures of your completed projects!
* I did not create this character. Gomamon is copyright of Bandai. This pattern is not affiliated with, endorsed by, or sponsored by Bandai. This pattern is not branded as anything affiliated with the said franchise.