

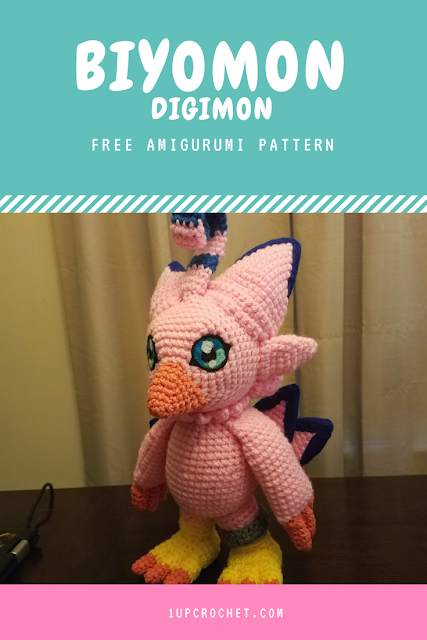
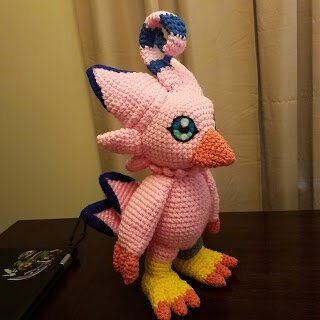
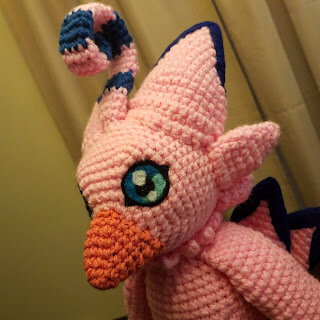
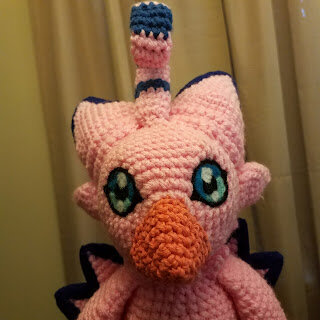
Biyomon Amigurumi Pattern
MATERIALS NEEDED
· G Hook (4.0mm crochet hook)
· Pink Yarn - I used Studio Classic in Soft Rose
·Orange/Tangerine Yarn - I used Sugar 'n Cream in Tangerine
· Grey Yarn
· Yellow Yarn
· White, Blue, and Black felt
· Felting needle
· 18 gauge stem wire
· Fiber Fil stuffing
· Scissors
· Yarn Needle for sewing
Optional: Hot glue gun
A few notes before we begin:
-This amigurumi requires the use of needle felting! I use needle felting in this pattern to create the blue stripes on Biyomon's head feathers and tail feathers.
-While creating this amigurumi you will work in continuous rounds, unless told otherwise.
-When I am creating an amigurumi based on a certain character I like to look at reference pictures of the character I am creating. It really helps when assembling the pieces and making the facial features!
*You may not claim this pattern as your own. You may not reprint or sell this pattern.
*If you use this pattern I ask that you please give me credit as the original designer and link the pattern back to me.
*Feel free to make changes or adapt this pattern as you see fit. After all, this is YOUR creation! But please, as stated above, give me credit for the original design.
Abbreviations
SC = Single Crochet
INC = Increase (2 SC in one)
Sl St= Slip Stitch
DEC = invisible decrease
Head
Use Pink.
1.
8 SC in Magic Ring (8)
2.
INC around (16)
3.
3 SC, 3 SC in the next st; repeat around (24)
4.
5 SC, 3 SC in the next st; repeat around (32)
5.
7 SC, 3 SC in the next st (40)
6.
9 SC, 3 SC in the next st (48)
7.
-17 SC around (48)
18.
6 SC, DEC; repeat around (42)
19.
5 SC, DEC; repeat around (36)
20.
4 SC, DEC; repeat around (32)
21.
3 SC, DEC; repeat around (24)
22.
2 SC, DEC; repeat around (18)
23.
1 SC, DEC; repeat around (12)
24.
DEC; repeat around (6)
Close off.
*note: The side with the increases is the front side of the head where the facial details will be placed.
Top Head Spike
Use Pink. Make 2.
1.
3 SC in MR (3)
2.
INC around (6)
3.
1 SC, INC; repeat around (9)
4.
2 SC, INC; repeat around (12)
5.
3 SC, INC; repeat around (15)
6.
4 SC, INC; repeat around (18)
7.
5 SC, INC; repeat around (21)
8.
6 SC, INC; repeat around (24)
9.
7 SC, INC; repeat around (27)
10.
8 SC, INC; repeat around (30)
11.
-13 sc around (30)
14.
Turn, 2nd chain from hook, sl st, sc 13, sl st, turn
15.
Sl st, sc 12, sl st
16.
Sl st, sc 10, sl st
Finish off. Leave open, do not stuff. Fold the piece flat.
Mid Spike
Use Pink. Make 2.
1.
3 SC in MR (3)
2.
INC around (6)
3.
1 SC, INC; repeat around (9)
4.
2 SC, INC; repeat around (12)
5.
3 SC, INC; repeat around (15)
6.
4 SC, INC; repeat around (18)
7.
Sc
8.
Sc
9.
Sl st, sc 7, sl st
Finish off. Leave open, do not stuff. Fold the piece flat.
Small Spike
Use Pink. Make 2.
1.
3 SC in MR (3)
2.
INC around (6)
3.
1 SC, INC; repeat around (9)
4.
2 SC, INC; repeat around (12)
5.
Turn, Sl St, 5 SC, Sl St
Finish off. Leave open, do not stuff. Fold the piece flat.
Beak
In Tangerine/orange
1.
4 SC in MR (4)
2.
INC; repeat around (8)
3.
1 SC, INC; repeat around (12)
4.
2 SC, INC’ repeat around (16)
5.
3 SC, INC; repeat around (20)
6.
4 SC, INC; repeat around (24)
7.
SC around (24)
Finish off. Leave open and stuff.
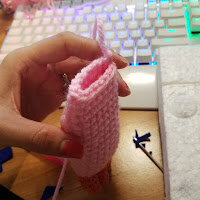
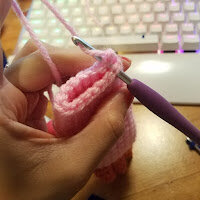
Body
Use Pink.
1.
6 SC in Magic ring (6)
2.
INC around (12)
3.
1 SC, INC; repeat around (18)
4.
2 SC, INC; repeat around (24)
5.
3 SC, INC; repeat around (30)
6.
4 SC, INC; repeat around (36)
7.
5 SC, INC; repeat around (42)
8.
– 13.SC around (42)
14.
5 SC, DEC; repeat around (36)
15.
SC
16.
SC
17.
SC
18.
4 SC, DEC; repeat around (30)
19.
SC (30)
20.
3 SC, DEC; repeat around (24)
21.
2 SC, DEC; repeat around (12)
Finish off. Leave open and stuff.
Wing
Use Pink. Make 2.
1.
Chain 8, SC down the chain then SC down the other side (14)
2.
(INC, 2 SC) x 4, INC, SC 1 (19)
3.
Sc around (19)
4.
Sc around (19)
5.
-14 SC around (19)
15.
DEC, 8 SC, DEC, 8 SC (17)
16.
DEC, 7 SC, DEC, 7 SC (15)
17.
SC (15)
18.
SC (15)
Lighty stuff, then SC across the opening to close.
Claws
Use orange/tangerine. Make 6.
1.
3 SC in magic ring (3)
2.
INC (6)
3.
5 SC, INC (7)
4.
-6 SC (7)
Finish off. Leave open.
Neck Fluff
1.
Chain 25, Sl St into the 2nd chain from hook
2.
Chain 3, [now crochet down the side of the chain, starting in the 2nd chain from hook] Sl St, 1 SC, [the next stitch will be placed on the base chain] Sl St, Sl St
3.
Repeat step 2 until you get to the end of the base chain. You should end up with a total of 12 spikes. See image below for reference

Legs
Start in Pink.
Make two legs.
1.
Chain 18, join ends together with a Slip Stitch.
2.
SC around (18)
3.
SC around (18)
4.
4 SC, DEC; repeat around (15)
Change to yellow.
5.
In back loops: SC around (15)
6.
SC around (15)
7.
SC around (15)
8.
SC around (15)
Finish off. Leave open and stuff.
Foot
Use Yellow. Make two.
1.
6 SC in Magic Ring
2.
INC around (12)
3.
1 SC, INC; repeat around (18)
4.
5 SC, INC; repeat around (21)
5.
SC around (21)
6.
5 SC, DEC; repeat around (18)
7.
SC around (18)
8.
SC around (18)
9.
5 SC, 2 DEC, 5 SC, 2 DEC (14)
Sew closed in a straight line across.
Toes
Make six.
Start with tangerine/orange.
1.
3 SC in Magic Ring. (3)
2.
INC around (6)
3.
5 SC, INC (7)
4.
SC around (7)
Color change to yellow
5.
SC around (7)
6.
SC around (7)
7.
SC around (7)
Leave open and stuff.
Tail Feathers
Make four.
1.
3 SC in Magic Ring.
2.
INC around (6)
3.
1 SC, INC; repeat around (9)
4.
2 SC, INC; repeat around (12)
5.
SC around (12)
6.
3 SC, INC; repeat around (15)
7.
SC around (15)
8.
4 SC, INC; repeat around (18)
9.
-14. SC around (18)
15.
4 SC, DEC; repeat around (15)
16.
3 SC, DEC; repeat around (12)
17.
2 SC, DEC; repeat around (9)
18.
1 SC, DEC; repeat around (6)
19.
DEC around (3)
Close off. Do not stuff. Fold the tail feather flat.
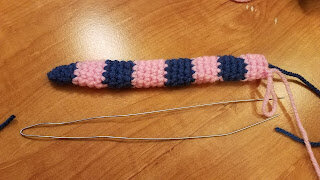
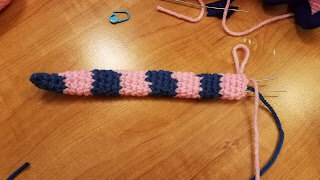
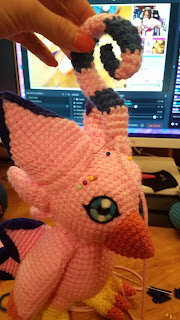
Curly Head Feather
Use pink and blue. Make one.
Start with blue.
1.
SC 3 in Magic Ring (3)
2.
2 SC, INC (4)
3.
3 SC, INC (5)
4.
4 SC, INC (6)
Color change to pink.
5.
5 SC, INC (7)
6.
6 SC, INC (8)
7.
SC around (8)
8.
SC around (8)
Color change to blue
9.
-12. SC around (8)
Color change to pink.
13.
– 16. SC around (8)
Color change to blue
17.
– 20. SC around (8)
Color change to pink
21.
-24. SC around (8)
Color change to blue
25.
-28. SC around (8)
Color change to pink
29.
SC around (8)
30.
SC 6, DEC (7)
31.
SC 5, DEC (6)
32.
SC, 4 DEC (5)
Finish off and leave open. Do not stuff.
Take the stem wire and fold it in half, making a pointed end. Run the wire up through the head feather and then bend it into a curly question mark shape.
Leg Brace
Use grey.
For this piece we will be crocheting in rows, NOT in the round!
1.
Chain 21, SC into the 2nd chain from hook, SC down the chain. Chain 1, then turn your work. (20)
2.
SC across (20)
Assembly
1. Sew the head onto the opening of the body.
2. Sew on the top head spikes, then the mid spikes, then the bottom spikes. At this point, you can use your blue felt and felting needle to felt on the blue stripes to the top head spikes. Or you can wait until the end of assembly to felt on all the details, it's up to you!
3. Sew the beak onto the front of the face.
4. Needle felt the eyes onto the face.
5. Sew the neck fluff around the neck.
6. Sew the claws to the ends of the wings, then sew the wings to the body at the level just below the neck.
7. To assemble the legs, sew the toes to the straight/flat side of the foot piece. Then, sew the leg piece on the top of the feet.
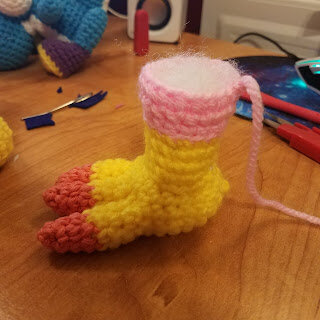
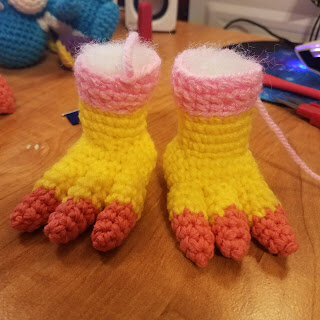
Assembled legs
8. Before you sew the legs to the bottom of the body, sew the grey leg brace onto left leg.
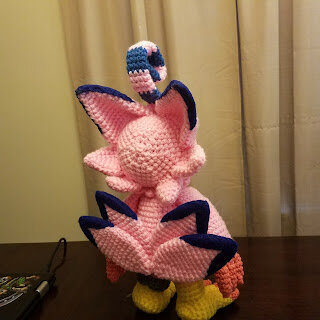
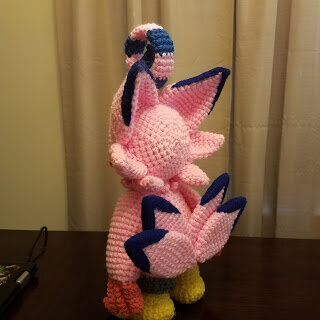
9. Assemble the tail feathers together, then sew the tail feathers to the backside of the body. See the pictures below on tail assembly. They should help give you a good idea on how I put them together. You can needle felt on the blue before or after the assembly. I have done it beforehand.
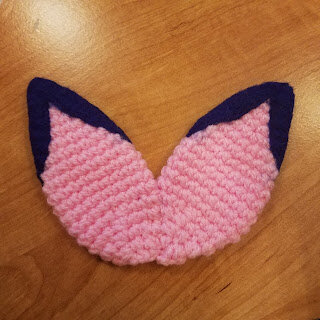
Take 2 feathers and sew them together at the sides.
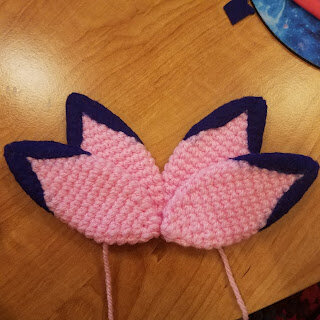
Place the two remaining feathers on top and fan them out a bit more than the feathers on the bottom.
10. Sew the legs on to the bottom of the body. OR, if you are having a hard time getting biyomon to stand you could also sew them so that they put biyomon in a sitting position. See the pictures below.
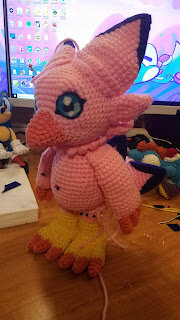
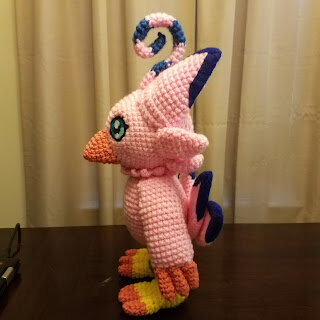
Standing

Sitting
11. Sew the head feather on to the top of the head between the top head spikes.
All finished!

Thank you so much!
Thanks for checking out my pattern! I had a great time making Biyomon and I hope you did too! If you have any questions or notice any inconsistencies in the pattern, let me know in the comments below and I'll do my best to get back to you.
I'd love to see your work too!
Shout out to me on twitter at
and show me pictures of your completed projects!
* I did not create this character. Biyomon is copyright of Bandai. This pattern is not affiliated with, endorsed by, or sponsored by Bandai. This pattern is not branded as anything affiliated with the said franchise.