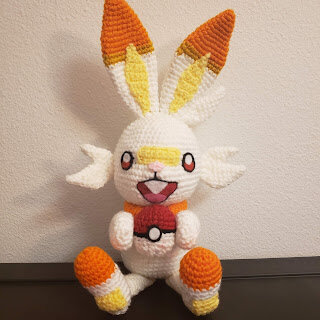

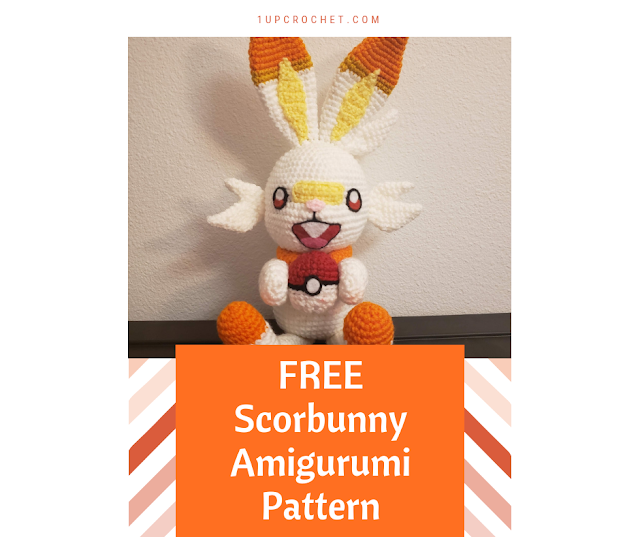
Scorbunny Amigurumi Pattern

A few notes before we begin
-While creating this amigurumi you will work in continuous rounds, unless told otherwise.
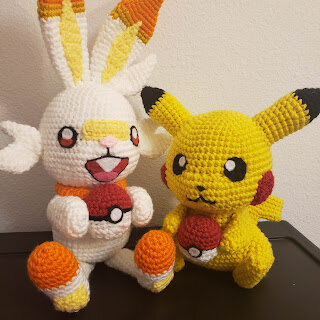
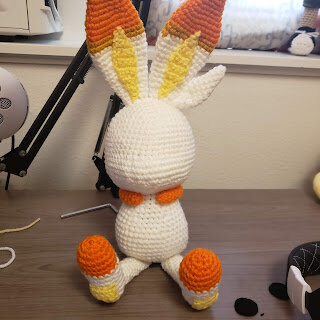
-When I am creating an amigurumi based on a certain character I like to look at reference pictures of the character I am creating. It really helps when assembling the pieces and making the facial features!
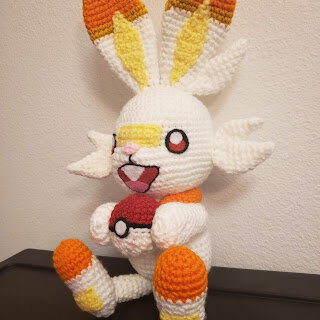
-Your finished amigurumi should measure about 14 inches tall, depending on yarn type and tension.
ª I DID NOT CREATE THIS CHARACTER. Scorbunny IS COPYRIGHT OF GAMEFREAK. THIS PATTERN IS NOT AFFILIATED WITH, ENDORSED BY, OR SPONSORED BY GAMEFREAK. THIS PATTERN IS NOT BRANDED AS ANYTHING AFFILIATED WITH SAID FRANCHISE.
ª YOU MAY NOT CLAIM THIS PATTERN AS YOUR OWN. YOU MAY NOT REPRINT OR SELL THIS PATTERN.
ª IF YOU USE THIS PATTERN I ASK THAT YOU PLEASE GIVE ME CREDIT AS THE ORIGINAL DESIGNER AND LINK THE PATTERN BACK TO ME.
ª FEEL FREE TO MAKE CHANGES OR ADAPT THIS PATTERN AS YOU SEE FIT. AFTER ALL, THIS IS YOUR CREATION! BUT PLEASE, AS STATED ABOVE, GIVE ME CREDIT FOR THE ORIGINAL DESIGN.
Materials Needed
o G Hook (4.0mm crochet hook)
o White Yarn
o Orange Yarn
o Light Yellow Yarn
o Gold Yarn
o Pink Yarn
o Optional Pokeball needs: Black, Red, and White yarn
o Craft felt in the following colors: Black, White, Orange, Red, Pink
o Stem Wire no thinner than 22 gauge
o Hot glue/ tacky glue. (Optional: instead of glue you can use a felting needle)
o Fiber Fil stuffing
o Scissors
o Yarn Needle for sewing
Abbreviations
SC = Single Crochet
INC = Increase (2 SC in one)
HDC= Half double crochet
DC = Double crochet
DEC = invisible decrease
Sl St = Slip Stitch
F/O = Finish off.
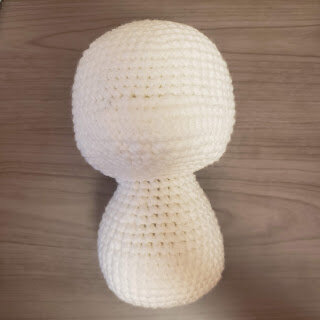
Head
Use White.
Round 1) 6 SC in Magic Ring (6)
Round 2) INC around (12)
Round 3) 1 SC, INC; repeat around (18)
Round 4) 2 SC, INC; repeat around (24)
Round 5) 3 SC, INC; repeat around (30)
Round 6) 4 SC, INC; repeat around (36)
Round 7) 5 SC, INC; repeat around (42)
Round 8) 6 SC, INC; repeat around (48)
Round 9) 7 SC, INC; repeat around (54)
Round 10) – Round 14) SC around (54)
Round 15) INC x 6 in Front Loops, 3 SC in Front Loops, 41 SC, 3 SC in Front Loops (60)
Round 16) 9 SC, INC; repeat around (66)
Round 17) SC around (66)
Round 18) SC around (66)
Round 19) [1 SC, DEC] x5, 48 SC, 1 SC, DEC (60)
Round 20) 3 SC, DEC; repeat around (48)
Round 21) 6 SC, DEC; repeat around (42)
Round 22) 5 SC, DEC; repeat around (36)
Round 23) 4 SC, DEC; repeat around (30)
Finish off with a slip stitch. Do not close off. Stuff the head.
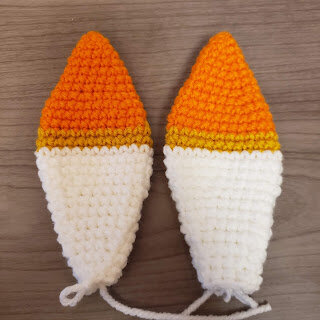
Ears
Make two. Start with ORANGE.
Round 1) 3 SC in Magic Ring (3)
Round 2) INC around (6)
Round 3) 1 SC, INC; repeat around (9)
Round 4) 2 SC, INC; repeat around (12)
Round 5) SC around (12)
Round 6) 3 SC, INC; repeat around (15)
Round 7) SC around (15)
Round 8) 4 SC, INC; repeat around (18)
Round 9) SC around (18)
Round 10) 5 SC, INC; repeat around (21)
Round 11) 6 SC, INC; repeat around (24)
Round 12) SC around (24)
Color change to GOLD.
Round 13) SC around (24)
Round 14) SC around (24)
Color change to WHITE.
Round 15) SC around (24)
Round 16) SC around (24)
Round 17) SC around (24)
Round 18) 6 SC, DEC; repeat around (21)
Round 19) SC around (21)
Round 20) 5 SC, DEC; repeat around (18)
Round 21) SC around (18)
Round 22) 4 SC, DEC; repeat around (15)
Round 23) SC around (15)
Round 24) 3 SC, DEC; repeat around (12)
Round 25) SC around (12)
Round 26) 2 SC, DEC; repeat around (9)
Round 27) SC around (9)
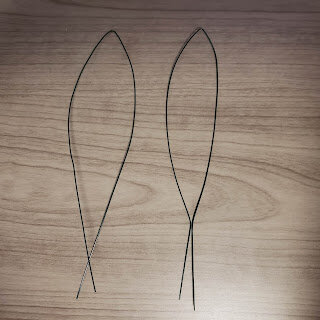
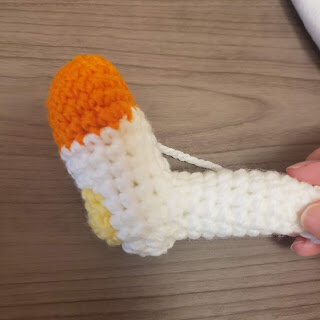
Finish off. Do not stuff the ear, fold it flat. Take your stem wire and fold it into a “v” shape similar to the picture below. Place the stem wire inside the ears. This will give the ears support so that they can stand erect on top of Scorbunny’s head.
Round 14) SC around (24)
Color change to WHITE.
Round 15) SC around (24)
Round 16) SC around (24)
Round 17) SC around (24)
Round 18) 6 SC, DEC; repeat around (21)
Round 19) SC around (21)
Round 20) 5 SC, DEC; repeat around (18)
Round 21) SC around (18)
Round 22) 4 SC, DEC; repeat around (15)
Round 23) SC around (15)
Round 24) 3 SC, DEC; repeat around (12)
Round 25) SC around (12)
Round 26) 2 SC, DEC; repeat around (9)
Round 27) SC around (9)
Finish off. Do not stuff the ear, fold it flat. Take your stem wire and fold it into a “v” shape similar to the picture below. Place the stem wire inside the ears. This will give the ears support so that they can stand erect on top of Scorbunny’s head.
Ear Fur Spike
Use WHITE.
Round 1) 3 SC in Magic Ring (3)
Round 2) INC around (6)
Round 3) SC around (6)
Round 4) 5 SC, INC (7)
Round 5) 6 SC, INC (8)
Round 6) 7 SC, INC (9)
Round 7) 8 SC, INC (10)
Round 8) 9 SC, INC (11)
Round 9) 10 SC, INC (12)
Round 10) DEC x 6 (6)
Round 11) SC around (6)
Round 12) DEC x 3 (3)
Finish off. Do not stuff, Fold flat.
Inner Ears Use LIGHT YELLOW
This piece is worked in ROWS, not rounds. At the end of each row you will chain 1 before you turn your work for the next row.
Chain 2.
Row 1) SC (1)
Row 2) INC (2)
Row 3) SC, SC (2)
Row 4) SC, INC (3)
Row 5) SC, INC, SC (4)
Row 6) SC across (4)
Row 7) SC across (4)
Row 8) SC across (4)
Row 9) SC across (4)
Row 10) SC, DEC, SC (3)
Row 11) SC, DEC (2)
Row 12) SC, SC (2)
Row 13) DEC (1)
Row 14) SC (1)
Finish Off.
Body
Use WHITE.
Chain 8. We are going to crochet around the chain.
Round 1) 6 SC, 3 SC in the next stitch, 6 SC, 3 SC in the next stitch (18)
Round 2) 2 SC, INC; repeat around (24)
Round 3) 3 SC, INC; repeat around (30)
Round 4) 4 SC, INC; repeat around (36)
Round 5) 5 SC, INC; repeat around (42)
Round 6) SC around (42)
Round 7) SC around (42)
Round 8) SC around (42)
Round 9) SC around (42)
Round 10) SC around (42)
Round 11) 5 SC, DEC; repeat around (36)
Round 12) SC around (36)
Round 13) SC around (36)
Round 14) 4 SC, DEC; repeat around (30)
Round 15) SC around (30)
Round 16) SC around (30)
Round 17) 3 SC, DEC; repeat around (24)
Round 18) Sc around (24)
Round 19) SC around (24)
Round 20) SC around (24)
Finish with a Slip Stitch. Stuff the body. Leave open, do not close off.
Tail
Use WHITE.
Round 1) 6 SC in Magic Ring (6)
Round 2) INC around (12)
Round 3) SC around (12)
Round 4) SC around (12)
Round 5) 2 SC, DEC; repeat around (8)
Finish off with a slip stitch and stuff. Leave open.
Arms
Use WHITE. Make two.
Round 1) 6 SC in Magic Ring (6)
Round 2) INC around (12)
Round 3) 1 SC, INC; repeat around (18)
Round 4) SC around (18)
Round 5) Sc around (18)
Round 6) 4 SC, DEC; repeat around (15)
Round 7) SC around (15)
Round 8) 3 SC, DEC; repeat around (12)
Round 9) SC around (12)
Round 10) SC around (12)
Round 11) SC around (12)
Round 12) 2 SC, DEC; repeat around (8)
Round 13) SC around (8)
Round 14) SC around (8)
Round 15) SC around (8)
Finish off. Stuff the arm lightly. Fold the open ends of the arms flat and sew across to close.
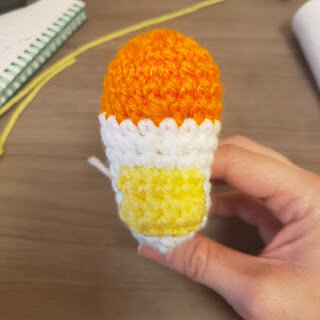
Feet
Use Orange and White. Make two.
Start with ORANGE.
Round 1) 6 SC in Magic Ring (6)
Round 2) INC around (12)
Round 3) 1 SC, INC; repeat around (18)
Round 4) 5 SC, INC; repeat around (21)
Round 5) SC around (21)
Round 6) 5 SC, DEC; repeat around (18)
Color change to WHITE.
Round 7) SC around (18)
Round 8) 4 SC, DEC; repeat around (15)
Round 9) – Round 13) SC around (15)
Round 14) 1 SC, DEC; repeat around (10)
Round 15) DEC around (5)
Stuff and close off.
Legs
Use WHITE. Make two.
Chain 9, then join the ends of the chain with a slip stitch.
Round 1) SC around (9)
Round 2) – Round 10) Sc around (9)
Finish off with a slip stitch. Stuff the leg.
Take the end of the leg that started with the chain, fold it in half, and sew it across to close that end. This should make the end of the leg flat. This will be the end that we sew to the bottom of the body. The open end will be sewn to the top of the foot.
Facial Square
Use LIGHT YELLOW
For this piece we will crochet in ROWS, not rounds. At the end of each row, you will chain 1 before turning.
Chain 8
Row 1) SC across (7)
Row 2) SC across (7)
Row 3) SC across (7)
Finish off.
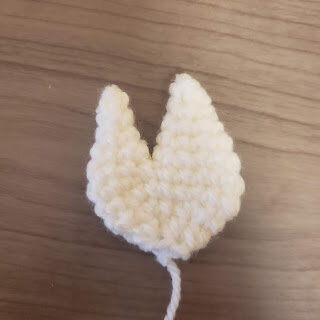
Cheek Fur
Make two.
For the cheek fur we are going to crochet two cone shapes that will be crocheted together to make one piece. The finished cheek fur piece will be folded flat, not stuffed.
Small Cone
Use WHITE
Round 1) 3 SC in Magic Ring.
Round 2) 2 SC, INC (4)
Round 3) 3 SC, INC (5)
Round 4) 4 SC, INC (6)
Round 5) 1 SC, INC; repeat around (9)
Finish off with a slip stitch.
Large Cone
Use WHITE
Round 1) 3 SC in Magic Ring (3)
Round 2) 2 SC, INC (4)
Round 3) 1 SC, INC, 1 SC, INC (6)
Round 4) 2 SC, INC; repeat around (8)
Round 5) 3 SC, INC; repeat around (10)
Round 6) 4 SC, INC; repeat around (12)
Finish off with a slip stitch.
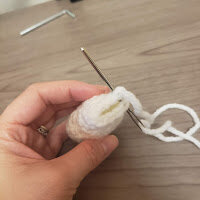
Crochet cones together
Insert hook through both cones at any stitch and pull yarn through and make a slip stitch.
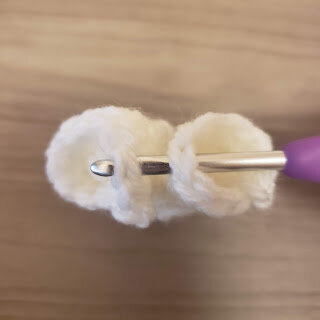
Continue to crochet in the round around the two cones.
Once you make a full round, at the 21st stitch, place your stitch marker to mark the end of the round.
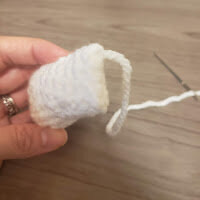
Round 8) 5 SC, DEC; repeat around (18)
Round 9) 1 SC, DEC; repeat around (12)
Round 10) DEC around (6)
Finish off with a slip stitch. Do not close. Your finished cheek fur piece should look like this.
Nose
Use LIGHT PINK.
Crochet in ROWS, not rounds.
Chain 4
Row 1) Slip Stitch, HDC, Slip Stitch (3)
Finish off. Leave a tail for sewing.
Bottom Foot Pad
Use LIGHT YELLOW.
We will crochet in ROWS, not rounds.
Chain 6.
Row 1) SC across (5)
Row 2) SC across (5)
Row 3) SC across (5)
Finish off.
Neck Piece
Use ORANGE.
Round 1) SC 5 in Magic Ring (5)
Round 2) SC acround (5)
Round 3) -Round 32) SC around (5)
Close off. Since this piece is so thin you shouldn’t need to stuff it.
Optional Mini-Pokeball
Start with RED.
Round 1) SC 6 in Magic Ring. (6)
Round 2) INC around (12)
Round 3) 1 SC, INC; repeat around (18)
Round 4) 2 SC, INC; repeat around (24)
Round 5) SC around (24)
Round 6) SC around (24)
Round 7) Sl St around (24)
Color change to BLACK
Round 8) Sl St around in back loops (24)
Color change to WHITE
Round 9) Sl St in around in back loops (42)
Round 10) SC around (24)
Round 11) 2 SC, DEC; repeat around (18)
Round 12) 1 SC, DEC; repeat around (12)
Round 13) DEC around (6)
Stuff the ball and close off.
Cut
out a small circle of black felt and a slightly smaller circle of white felt
for the button. You can glue them on or needle felt them on.
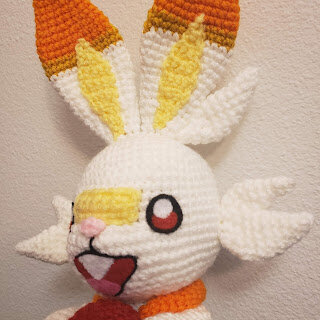
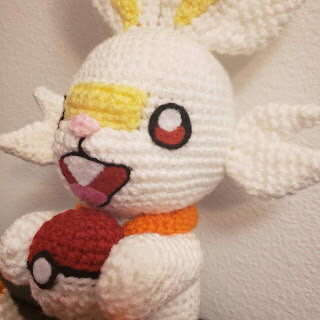
Facial Details
For the eyes, cut out two circle shapes from the black felt and two small white circles for the eye highlights. Cut out a small circle of orange felt for the colored part of the lower eye.
For the mouth, cut out a medium-sized triangle shape with the red felt. Then cut a smaller pink triangle for the tongue and a white triangle for the teeth.
You can either glue or needlefelt these pieces to the face.
It's a good idea to have reference photos of Scorbunny to look at while making the facial details. It really helps in getting the proportions and spacing of the details of the face as accurate as possible.
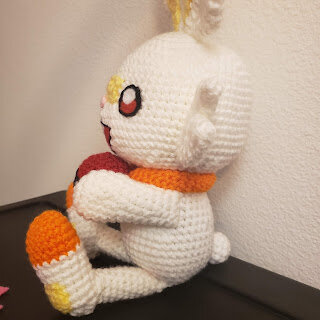
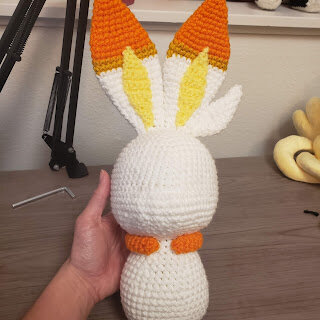
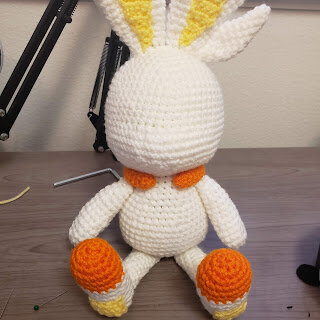
Assembly
1) Sew the head to the body.
2)Sew the small fur spike to the side of the ear. Then sew the inner ear to the front of the ear.

3) Sew the ears to the top of the head.

4) Sew the neck piece around the neck.
5)Sew the foot pads to the bottom of the feet, then sew the legs to the top of the feet.
6)Sew the legs to the bottom of the body.
7) Sew the tail onto the back side of the body.
8) Sew the arms to the side of the body.
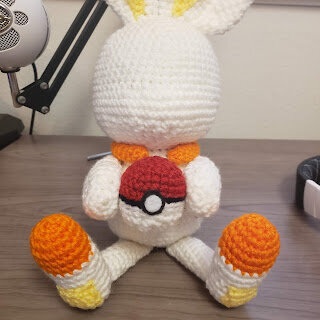
*note: If you decide to use the Pokeball, sew the arms onto the body reaching forwards.


At this point you are ready to begin sewing and needle felting on the facial details.
Start by sewing on the Light Yellow Facial Square.
You can either use glue to attach the eyes and mouth or you can needle felt. Whichever you prefer.